Why Your Knives Aren’t Getting Sharp (And How to Fix It)
A dull knife is the bane of every cook. You press harder, the tomato squashes and all of a sudden you’re thinking why your expensive chef’s knife is worse than a butter knife. The problem’s often not your blade — it’s how you sharpen it. It’s surprising how many people have made a mistake while sharpening that ends up damaging their knives, even those who have been cooking for years.
The few common mistakes in knife sharpening. And figurative ones, too, such as tarnishing your blades, wasting your time and ending up with edges that are somehow worse than when you began sharpening. The good news? Once you know what’s wrong, the solutions are surprisingly simple.
In this guide, we run down five knife sharpening mistakes that home cooks commit all the time. But most importantly, you’re going to learn how to not make them. These tips will help you sharpen your knives using a whetstone, a sharpening rod or an electric knife sharpener to get the best results every time whether which method you choose to use.
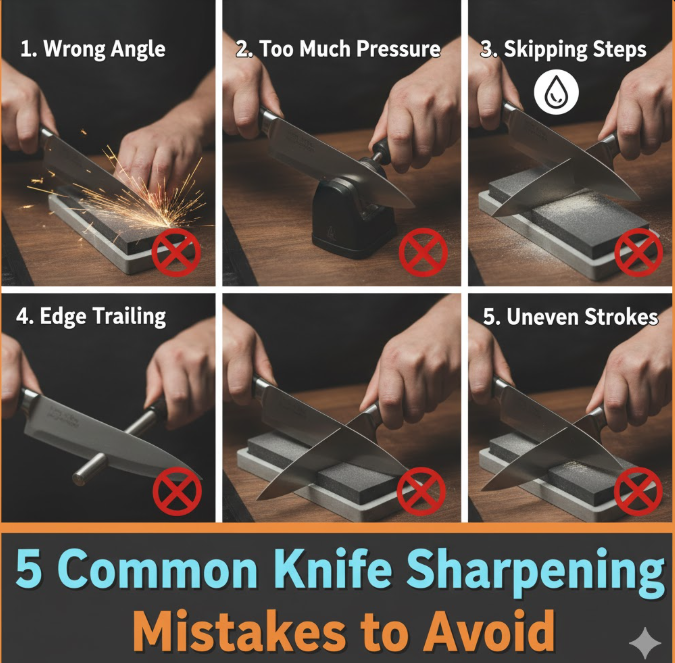
Mistake #1: Sharpening at The Wrong Angle
The Reason Why Angle Means More Than You Think
How you angle your knife when scraping it against a sharpening surface is absolutely crucial. This is perhaps the most common mistake made by people when sharpening a knife, and it’s easy to see why. With a knife in one hand, trying to keep it at just the right angle, the motion feels odd initially.
For most kitchen knives, a sharpening angle between 15 and 20 degrees will serve you well. Japanese knives generally perform best at 15 degrees, while Western-style knives are typically sharpened to 20 degrees. At too steep an angle — let’s say 30 degrees — you’ll make a sturdy, thick edge that won’t slice worth a damn. Too little, and you’ll end up with a knife that has an edge so fragile it either rolls or chips the first time you use it.
How to Get Your Angle Right
A simple trick that works like magic every time: take two quarters and stack them under the spine of your knife while the edge lays along your sharpening stone. This sets the angle at approximately 15°. For a 20° angle, begin with three quarters.
An alternative method is to use a permanent marker to color the bevel edge of your knife. After some strokes on your stone, check where the marker has been worn off. If the mark is wearing from the edge, your angle is too low. If the marker is wearing from the higher area near the bevel, your angle is too high.
Several modern sharpeners have angle guides or clips that fit onto your blade. They are not considered cheating since they are convenient tools that help ensure uniformity. Uniformity is more crucial than the exact perfect angle since shifts in angles during a session result in distinct bevels that reduce the power of your blade to cut.
Mistake #2: Skipping the Coarse Grit
The Grit Progression That No One Talks About
A popular mistake in knife sharpening is heading straight to a fine stone or, alternatively, never moving ahead of your coarse stone. Both tactics leave you unimpressed.
Imagine grits as sandpaper for wood. Could you file a rough board using 2000-grit paper? That is ridiculous. Give up on 60-grit finish for the same reasons. Sandpapers demonstrate how knives function.
The coarse stones (around 200-600 grit) work fast. They’re for fixing damaged edges, chips, or re-profiling a blade. Medium stones (800-2000 grit) are great for polishing the edge and removing the scratches from coarse. Fine stones (3000-8000 grit) hone the edge to paper thinness.
When to Use Which Grit
If your knife is very dull, you can use this on the second-most-dull edge followed up by a stone. If your knife is really dull — its edge can’t even cut paper — start with a coarse stone. You will have to grind away enough metal to form a new edge. Keep at 200-400 grit until you can feel a burr develop on the other side of the blade.
After you have defined your sharp edge with coarse grit, progress to medium. This is where the majority of your real sharpening occurs. You’re sharpening the edge and getting out the deep scratches from the coarse stone. For the majority of home cooks, you can stop here and have just about all the kitchen knife you need.
You can also skip the fine grit for kitchen knives, but I would recommend it if you want a razor’s edge. It’s crucial for specialty knives like sushi knives or fillet knives where you need the sharpest edge possible.
The biggest mistake? Using only the fine grit on a very dull knife. You’ll spend an hour getting nowhere because fines remove metal so slowly. Begin with a coarse one, move on to finer touches and you’ll have sharp knives in no time.
Mistake #3: Pressing Too Hard
The Light Touch That Changes Everything
A lot of times, people believe sharpening requires a lot of muscle. They bear down on the knife and hold it in a punishing grip, believing that stronger pressure will sharpen the blade more quickly. This is a common mistake in knife sharpening. However, it can actually make your blade worse off.
Cutting too hard doesn’t make the blade sharp faster — it makes it worse. Push too hard and you’ll lose your angle, produce inconsistent bevels and build up heat. Heat will also change the temper of your steel, leaving you with a soft edge when you are trying to get a more durable one.
In addition, the inconsistent pressure also causes trouble. If you press too hard with some strokes, and not hard enough with others, you will have an edge that’s not only chipped and jagged, but full of high spots and low spots. That edge may feel sharp in some areas but dull in others, and its performance is not going to be consistent when you are cutting.
Finding the Right Pressure
The perfect pressure is lighter than many people realize. Picture trying to cut into a stick of cold butter without breaking it — that’s roughly the amount of pressure you want. You are looking for firm contact between blade and stone, but not pushing anything.
Here’s a practical test: Put your sharpening stone on a kitchen scale. With what feels like right pressure, press down with your knife. You should get between 5 and 10 pounds of force for your coarse stones, even less for finer ones, maybe in the 3-to-5-pound range.
Maintain even pressure along the length of each stroke. You should begin your stroke with some pressure, keep it in the middle and also at the end. This creates a consistent bevel from heel to tip.
Your hands and arms should not become fatigued after sharpening. If they do, you’re trying too hard. Ease up on your grip, don’t press down too hard and let the stone do the work! The cutting here is being done by the abrasive surface, not your muscles.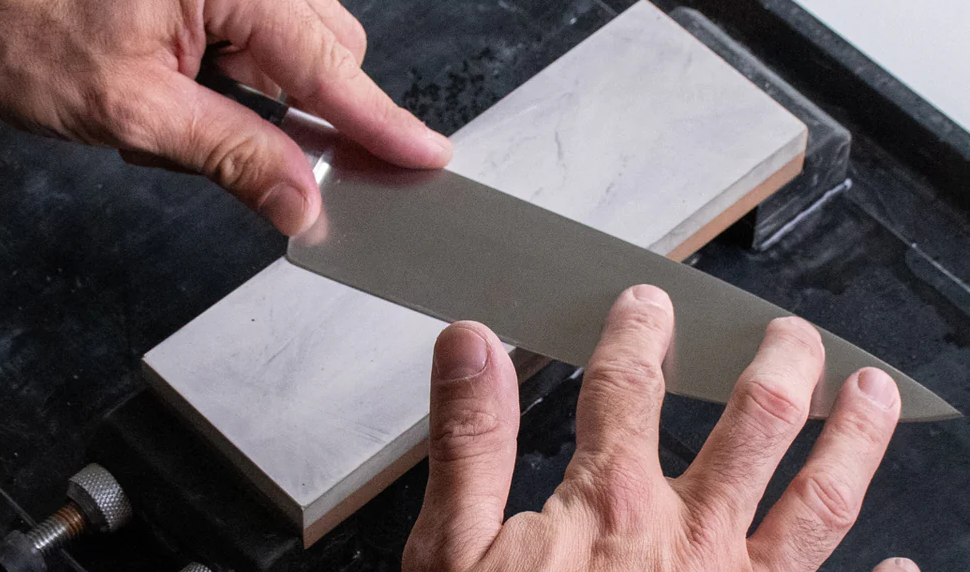
Mistake #4: Neglecting To Take Care of Your Sharpening Gear
Why Your Sharpening Stone Doesn’t Work Anymore
There is one mistake almost everyone makes the first time a knife goes dull. You invest in a fancy whetstone or sharpening system, you’re good about using it consistently and then after a few months the tool just doesn’t work as well. The issue isn’t one of your technique but rather of the tools you use to keep your blades in tip-top condition.
As you use whetstones they accumulate metal particles and dust on their face. This mixture, known as swarf, fills the pores of the stone and renders it a slippery surface. It would be like attempting to use sandpaper that was already clogged with sawdust. And the abrasive particles no longer can get at the metal.
Additionally, stones wear unevenly. The center of your stone is used more than the edges and therefore develops a depression, or “dish,” in the middle. With a dished stone, you cannot keep the same angle and you’re going to have a tough time sharpening your entire blade evenly.
How To Look After Your Sharpening Items
Clean your stones regularly. For water stones, just rinse them in running water for a few moments when used and afterwards. In the case of oil stones — which are not actually made of oil but do require it for proper use — clean them off with mineral oil and a rag. If your stone feels glazed or slippery, it’s time for a deep clean. You can use a nagura stone or even an old toothbrush to scrub the surface and open up the pores again.
Flatten your stones every couple of sessions. You can purchase a flat stone flattener, or you might consider using a sheet of wet/dry sandpaper (220-grit works well) over a flat surface, such as the back side of a piece of glass or granite countertop. Glide your stone, using figure-eight motion, until the entire surface is in contact with the sandpaper. And this typically only takes a few minutes.
Honing rods and steels likewise require some care. These, in truth, do not sharpen — they realign the edge — but they still attract those metal particles. Wipe down your honing rod with a damp cloth after each use, and give it an occasional gentle scrub with mild soap and water.
Store your stones properly. Keep them dry (other than ceramic stones, that is; they can remain wet), out of the elements and where they won’t get banged about. A broken stone is unsafe and inconvenient to use.
| Frequency | Maintenance Task | Tools Needed | Time Required |
|---|---|---|---|
| Every use | Clean swarf on surface | Water/oil, cloth | 1 minute |
| Every 10 sessions | Deep clean glazed surface | Nagura stone or brush | 5 minutes |
| Every 5-10 sessions | Flatten stone’s surface | Flattening stone/sandpaper | 5-10 minutes |
| Monthly | Check for cracks/damage | Visual inspection | 1 minute |
Mistake #5: Overlooking the Deburr and Strop
The Final Steps Everyone Skips
You’ve pulled your knife through all the grits and have a great new edge. You take a test cut, and… it’s not as sharp you thought it was. What happened? You skipped the last two: deburring, and stropping. This mistake is a common knife sharpening mistake and most people don’t know that they should be doing this.
When you sharpen a knife, you make a thin piece of metal to one side of the edge called “a burr.” That burr feels sharp if you run your finger along it and that tricks some people into thinking they’re done. But those burrs are weak and easy to fold over. The very first time you have something to cut, they’ll break off and though the result might not be terrible, it’s certainly a lot duller than what you’d hope for.
Stropping is the last final polish that takes out tiny teeth and imperfections in your edge. Think of it as buffing a shiny pair of shoes after you’ve polished them. A stropped edge is perceptibly smoother and keener than a “fresh” edge off the stone.
The Right Way to Finish Your Edge
To remove the burr, give it very gentle attention on your finest stone, using alternating sides after each pass. You should feel the burr diminish and detach itself. Some people make trailing strokes (pulling the knife along the stone) to cause or encourage the burr to break off more cleanly.
Another option is to make a very light cut through cork or end grain of wood. This should get the burr and strip it off without removing your freshly ground edge.
For stropping you can also use a leather strop loaded with honing compound, or even just a strip of clean leather or cardboard. Hold your strop with the smooth side down and pull the blade over the leather away from your body with the edge trailing, otherwise you can cut into your strop. Go at the same angle you did when you sharpened, or a bit steeper.
Do ten to twenty reps on each side, switching sides. You should feel the edge becoming smoother. When you are finished, your blade should cut through paper with no resistance and slide right through tomato skins without exertion.
A well-deburred and stropped knife will remain sharp, visibly longer than one that has only been sharpened. These last few steps can all be done in a couple of minutes, but they make a massive difference to performance.
How to Tell if Your Knife Is Truly Sharp
After you’ve prevented all these common mistakes when sharpening knives, checking your work is necessary. Here, however, are reliable tests to help you determine if your knife is truly sharp:
The Paper Test: Take a piece of regular printer paper in one hand. It should cut easily with a sharp knife. If it rips the paper or resists slicing through, your edge still requires some attention.
The Tomato Test: Put a ripe tomato on the cutting board. You should be able to press the tip of your knife into the skin and let gravity do the work: The blade will cut its way through with hardly any downward pressure on your part. If you find yourself pushing or sawing, keep sharpening.
The Arm Hair Test: This one may sound scary, but it’s safe if you’re careful. Hold the knife at a shallow angle above your forearm (without that tip touching skin). A sharp knife will grab arm hairs above the surface of the hand and cut through them cleanly. Dull blades will simply slide hairs to the side.
The Thumbnail Test: Lightly rest the edge on your thumbnail at a low angle. A sharp surface will stick a bit and try to bite. The dull side will slide on your nail. This test is done with a light touch — you’re not trying to slice yourself up.
FAQs About Knife Sharpening
How often should I be getting my kitchen knives sharpened?
Sharpen your primary chef’s knife every 2-3 months if used regularly. Hone it with a steel weekly. In professional kitchens, knives are sharpened far more regularly — sometimes every single day.
Can I sharpen serrated knives?
Yes, but it’s tricky. Every serration has to be tuned up with a micro rod or specialized sharpener. I think in general most people are better served by getting serrated knives professionally sharpened.
Is an electric sharpener bad for my knives?
Not necessarily. Good electric sharpeners are OK, but cheap ones grind away too much metal too fast. They are easy, but not as accurate as doing it manually. In those instances, avoid them for expensive Japanese knives.
How do honing and sharpening differ?
Honing realigns the edge without any material being removed. Sharpening removes metal to form a new edge. Hone for upkeep to keep the edge sharp longer between sharpenings.
Is it possible to sharpen a knife too much?
Yes. Over-sharpening does just cause you to lose blade life by taking off more metal than you need. Only sharpen when your knife is really, truly dull—honing deals with the small amount of edge rolling between proper sharpenings.
Should I soak my whetstone?
It depends. Water stones require soaking for 10-15 minutes prior to being used. Oil stones are used with honing oil, not water. Diamond stones require only a small amount of water—a few drops (lubricant). Check your stone’s instructions. For more detailed guidance on proper knife sharpening techniques and equipment, America’s Test Kitchen provides excellent resources.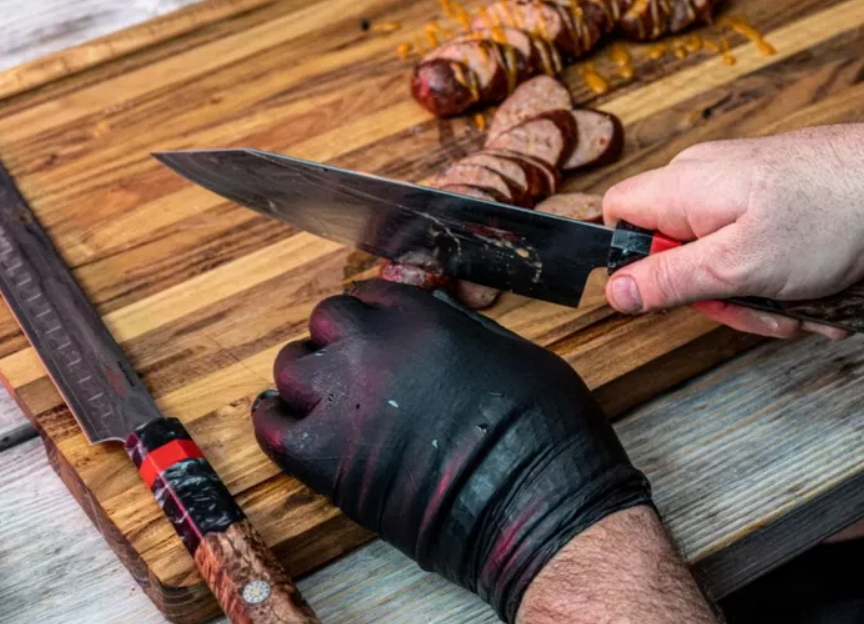
Start Sharpening Better Today!
So, there you have them – the top five knife sharpening mistakes and what to do about each one. The dividing line between a maddening sharpening session and one you’re happy with ultimately, in my opinion, breaks down to just a few key fundamentals: finding the right angles, having appropriately sized grits for progression purposes, using consistent pressure, keeping your tool well-maintained and ending things by deburring and stropping.
Begin with one knife and don’t rush. Just let yourself build the muscle memory for the right angle and pressure. You might feel silly at first, but after a few sessions it will start to feel natural. Your prize is a set of legitimately sharp knives that make cooking safer, faster and more satisfying.
And keep in mind that sharpening is an art that you become better at with practice. If your earliest efforts aren’t perfect, don’t be discouraged. All knife sharpeners were beginners once upon a time. The trick is learning what you are doing wrong, fixing your knife sharpening mistakes and getting the right habits ingrained from the start.
Get good sharpening gear and keep it in good shape, plus practice! Your knives — and your cooking — will thank you.