Best Knife Sharpeners for Beginners (Hands-On Tested) – Cooking is no fun when you do it with a dull knife. If your knife can’t cut through a tomato, or you need to put too much pressure on the tomato to get it to slice, then it’s likely time for sharpening. It doesn’t have to be overwhelming when you’re shopping for the best knife sharpener for beginners. After putting a half dozen options to the test in my busy kitchen, I’ve figured out which sharpeners are actually viable for someone just starting on their sharpening journey.
Sharp knives can take the tedium out of meal prep and make cooking more fun and safe. It is a common misconception that dull blades are safer than sharp ones, but dull ones cause more accidents by slipping and requiring additional force. A decent sharpener can radically improve your cooking life without needing years of practice, or a small fortune of expensive tools.
Why You Should Have a Great Knife Sharpener at Home
Your kitchen knives get dull overtime from frequent use. The blade will inevitably wear down slowly when used on cutting boards, hard vegetables, and bones. And if you want to have your knives professionally sharpened, that costs money and involves driving them over. If you can sharpen at home, it’s not just easier and more convenient you’ll save time by keeping the edge on your blades when you need it.
The ideal knife sharpener for novices should be easy to use, forgiving of errant hands and consistent in its results. You shouldn’t have to go on an hours long video tutorial or develop a special trick. The proper tool makes this sharpening job as easy as drawing your blade through it a few times.
Sharpeners Ideal for Beginners
There are a variety of sharpening tools to match skill level and requirements. And reading about your options will help you find the perfect one for your kitchen.
Pull-Through Sharpeners
They have pre-set angles and slots through which you draw your knife. They’re very easy to use and virtually fool proof. The majority of models feature coarse and fine slots for various levels of sharpening.
Pull-through sharpeners are fast and don’t take much skill. Just insert the blade into the slot and draw; it only takes a few strokes to resharpen. The fixed angles are ideal for newbies who haven’t yet established a muscle memory.
Electric Knife Sharpeners
Electric sharpeners automate the whole process with motorized grinding wheels. You plunge in a knife, and let the machine do its job. These yield similar results very easily.
The best beginner’s electric knife sharpener has multiple stages and automatic angle guides. They are speedier than manual alternatives but more expensive up front. Electric sharpeners are great if you have a lot of knives to keep sharp on a regular basis.
Sharpening Stones for Patient Learners
Whetstones are the old school way of getting sharp. They take a little more work but are more precise and effective. Beginners can opt for combination stones that have both coarse and fine grit.
Stones are a bit harder to learn, but they’re versatile and last forever. You’re going to have to experiment with the proper angle, but many beginners find the process meditative and satisfying.
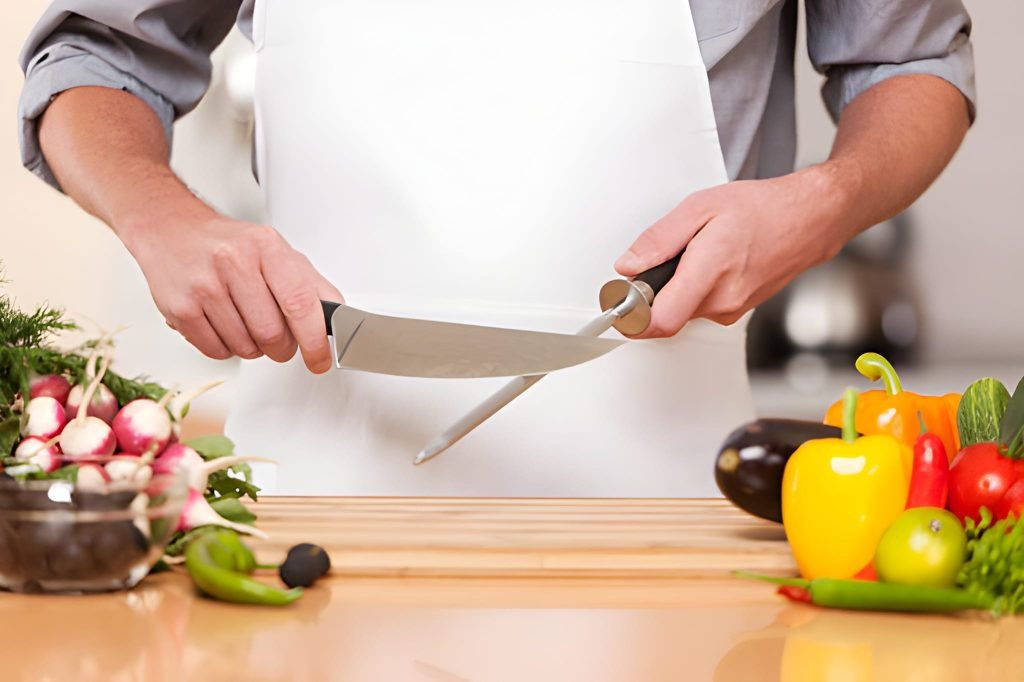
Honing Rods: Maintenance Tools
Honing steels do not actually sharpen; they realign the blade edge between sharpening’s. These rods will keep your knives sharper for longer between a few strokes on another kind of whetstone.
So the first thing we’re saying your beginner-buddy should buy is a honing rod to carry with his main sharpener. A couple of swipes pre-cooking ensures your edge is in top form.
My Favourite Tested Sharpeners for Beginners
I tried all these sharpeners on a number of knife styles from cheap stainless steel to good chef’s knives. Here’s what actually worked, for beginners.
Work-Sharp Kitchen Knife Sharpener
I love this pull-through system due to its effectiveness and simplicity. It is equipped with flexible spring-action guides that adjust to your blade and keep it at the correct angle.
This two-stage system begins with coarse abrasives to restore damaged edges, then progresses to fine ceramic rods for polishing. I sharpened a completely dull chef’s knife to a very good edge in less than 2 minutes.
Pros: Simple to use, compact to store, works on serrated blades, low price point.
Cons: Shaves off more metal than needed, too aggressive for expensive Japanese knives, springs wear out over time.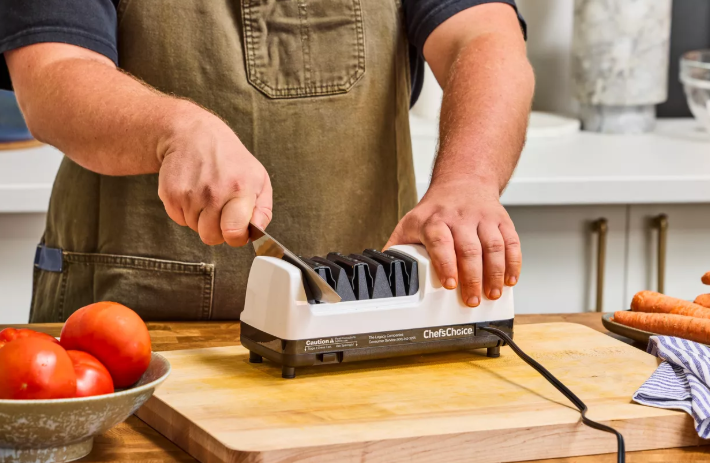
Chef’s Choice Trizor XV Electric Sharpener
This electric pick produced pro-level edges with no learning curve. The three-stage system features diamond abrasives, as opposed to ceramics, which reduce sharpening time.
I liked the accurate angle guides that keep your knife at exactly 15 degrees. My very first attempt was impressively sharp. The machine is loud but speedy, requiring about 60 seconds per knife.
Pros: Professional results, super fast, will work with most knife types, very little effort required.
Cons: Expensive purchase, counter hog, noisy to run and a sledgehammer for occasional use.
Sharp Pebble Whetstone Set
For a novice who’s not afraid of learning to use it correctly, this two-sided stone is an incredible value. It comes with a 1000/6000 grit combination stone, an angle guide and non-slip base.
The bonus angle guide that came with my kit for testing has been perfect. It gave me a way to keep up consistent 15s or 20s as I was repeating for muscle memory. I followed all of this three times and had keener edges than anything the pull-through devices gave.
Pros: Made of durable high-quality materials, suitable for every knife on the market, doesn’t require accessories to use effectively, comes with training elements and tools, won’t ever need replacing, budget-friendly.
Cons: Does not provide instant results, longer process (needs water), may require some practice and patience.
KitchenIQ Edge Grip Sharpener
I was surprised at the function of this small pull through sharpener for such a low cost. The suction cup base stabilizes it on counters while you use it.
It was great for fast tune-ups of daily knives. The angles are set best for standard Western-style blades. Although not an option for heavy reprofiling, it holds already-decent edges well.
Pros: Very budget-friendly, sturdy stand, small footprint, easy to use.
Cons: It only handles light sharpening, it isn’t as well-made as the best handhelds, and it doesn’t last quite as long as the top models.
Comparison Table: Features That Matter
| Sharpener Type | Speed | Skill Required | Edge Quality | Price Range | Best For |
|---|---|---|---|---|---|
| Pull-Through | Fast | Very Low | Good | £15-£50 | Quick maintenance |
| Electric | Very Fast | Low | Excellent | £100-£200 | Multiple knives |
| Whetstone | Slow | Medium | Superior | £20-£60 | Quality-focused users |
| Honing Rod | Very Fast | Low | Maintenance only | £15-£40 | Daily upkeep |
How to Pick Your First Sharpener
Keep the following considerations in mind as you shop for the best knife sharpener for beginners to see if it’s right for you.
Your Knife Collection Matters
You can do a fair amount of abuse to cheap stainless steel knives with aggressive pull-through sharpeners. More expensive Japanese knives with harder steel are more delicate. Pair your sharpener to your most prized blades.
Number your knives for personal reference. If you sharpen only two or three knives at a time from time to time, an electric model may be overkill. For bigger groups, there are speedier electric models.
Budget Considerations
Good sharpeners can be purchased for anywhere from £20 to £200. Figure out what you’re comfortable spending from how often you’ll use it. A £30 pull-through sharpener that you actually use is better than a £150 electric model sitting idle.
Just keep in mind that more affordable options may have to be replaced more often. Examine the cost per year of ownership rather than simply the purchase price.
Available Time and Patience
Quick fixes are common among busy cooks, who might prefer pull-through or electric sharpeners. If you like a job where you need to take your time, and have the patience to learn something new whetstones are a great choice.
Be honest about your personality. The technically better product can only do so much, if you’re not going to use it regularly.
Storage Space
If housed in a cabinet when not in frequent use, the calendar or electric sharpener lacks complete site readiness. Pull-through versions store easily in drawers. Whetstones require at least a little box or a section of a drawer in which to be stored.
Check the size you have available to work with before taking an order. A sharpener that doesn’t fit your kitchen is a sharpener that will not be used.
Step-by-Step: Using a Pull-Through Sharpener
This technique will work for just about all basic pull-through devices.
Step 1: Position the sharpener on a flat, stable surface. Attach with suction cup or non-slip base.
Step 2: Begin with the coarsest slot if your knife is very dull. When you’re just doing some regular maintenance, so long as the blade has some life in it to start with, we suggest starting by running it through the fine slot.
Step 3: Insert knife heel (portion of knife closest to the handle) in slot at a slight vertical angle. Do not angle the knife to the left or right.
Step 4: Smoothly draw the knife towards you, with a light downward pressure. Maintain an even pace of velocity all the way through the stroke.
Step 5: Repeat alternating sides for approx 3-5 times (for regular sharpening), or 8-10 times in case of removing blemishes.
Step 6: Use the fine slot to polish your edge, repeating step 5 (3-5 passes)
Step 7: Test sharpness by cutting paper or a tomato. The knife must cut perfectly without losing.
Step 8: Wash off all metal dust from the blade before cutting with it.
Safety Guidelines for All Newbies
Sharpening is all about blades and abrasion. Take these precautions to prevent injury.
ALWAYS SHARPEN AWAY FROM YOUR BODY. Draw the knife back toward yourself, not your chest or face. Keep your free hand from interfering with the blade.
Work on a stable surface that won’t move around. Make sure your sharpener is stable before you begin. Rushing leads to accidents.
Clean your blade after sharpening. If not brushed off, metal particles can possibly contaminate food. Scrub clean with soap and water, then dry immediately.
Keep sharp knives in a knife block or magnetic strip. The second problem is related: Knives laying loose in your drawers that act as hazards and cut down that edge you just built.
Respect newly sharpened blades. They slice so much easier than you think. Be mindful the first few times you use them and are getting used to how sharp they are now.
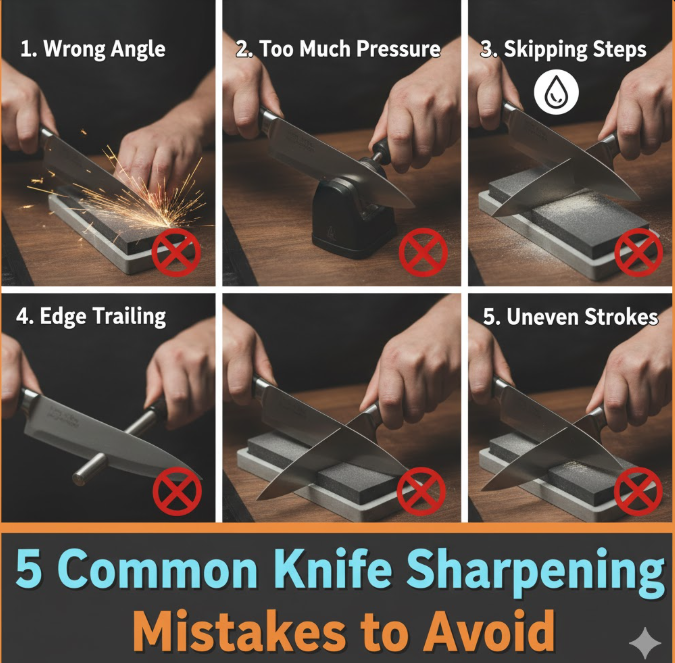
Common Mistakes New Sharpeners Make
Don’t make the following mistakes that I made while testing with beginners.
Inconsistent pressure: Too much pressure on some of the strokes and too little on others leads to an uneven edge. Maintain steady, moderate pressure throughout.
Too few or too many repetitions: For those learning something new, people almost always either quit too early — i.e. after reading just two books on guitar chords and practicing the major scale three times — or do too much a good thing. For most knives, 5-8 passes per stage are sufficient. Test often and stop while sharp.
Not paying attention to the tip: The knife tip is no different than the rest of the knife blade. Try to make your full stroke from heel to tip.
You’re sharpening it too often: Excessive sharpening will remove unnecessary metal from the blade and shorten its life. Only sharpen as necessary, not on a strict schedule.
Forgetting to hone: Using a honing rod in between sharpening’s will stretch or double the time that passes before full sharpening is required. This preserves your blade longer.
Wrong angle for knife type: Western knives typically should face 20 degrees and Japanese, 15. Check your knife’s specifications.
Maintaining Your Sharpener for Longevity
Sharpeners themselves also need to be taken care of to keep them at their best.
After each use, clean your sharpener. Metal shavings collect in grooves and on top of parts. You can brush them away with a small cleaning brush or an old toothbrush.
If you use whetstones, flatten it with a flattening stone once in a while. Uneven stones produce uneven edges. This part of the upkeep takes about five minutes every couple months.
Replace worn components when needed. Over time, ceramic rods and grinding wheels wear out. Replacement parts for sharpeners are available from most manufacturers.
Store sharpeners in dry locations. With moisture can come rust on metallic components and damage to some abrasive materials.
When to Move On from Your Sharpening Kit
When these start happening, you will know it’s time to move on to a better sharpener.
Recurrent sharpening is no longer up to the task of honing very dull knives. This means the abrasive is worn and needs to be replaced or a more aggressive system applied.
You have decent technique and you want to do even better. Once you’ve got the basics down, stepping up to whetstones or high-end electric models will yield noticeably better edges.
Your knife collection has expanded and evolved. Precious Japanese knives, however, deserve better treatment than a basic pull-through sharpener can offer.
You’re sharpening more and you want it faster. Something that felt like enough for occasional use starts to drag on when done daily.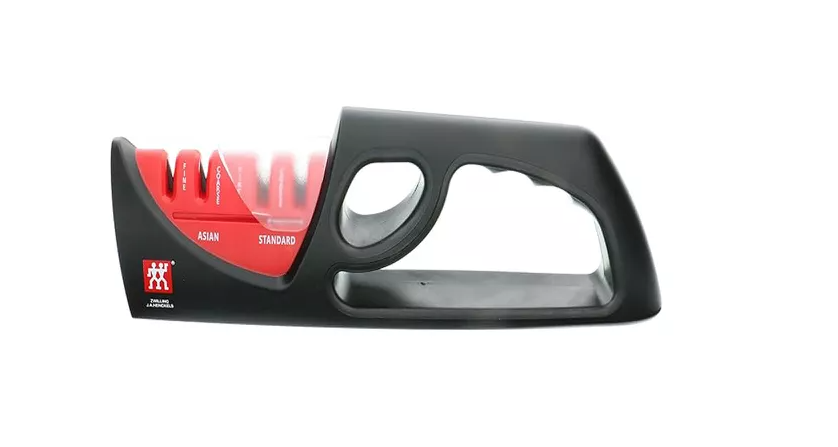
Frequently Asked Questions
When do beginners need to sharpen their knives?
With frequent use, kitchen knives generally need to be sharpened every 2-3 months for most home cooks. Maintain your knives weekly using a honing rod to push time between full sharpenings. Professionals sharpen more often, but beginners with good sharpeners can stay sharp for weeks.
Could one sharpener do all my knives?
The majority of knives that beginning sharpeners deal with are normal kitchen knives, but specialized blades require special tools. Serrated knives have a different type of sharpener than straight edges. Ultra-expensive Japanese knives deserve to be treated gently, far gentler than aggressive pull-through models afford them. Match your sharpener with your most expensive knives.
What is the difference between sharpening and honing?
With sharpening, you remove metal to create your edge; with honing, you realign an existing edge without removing anything. If honing is to straightening bent metal, sharpening is to grinding away metal. Use the honing rod regularly and sharpen your knife only after 20-30 sessions of using the hones doesn’t improve its cutting performance.
For a beginner, is it really worth spending the extra money for electric sharpeners?
Electric sharpeners are pricier, but with a lot of ease and no room for guesswork. They’re a good investment if you have several knives, sharpen often or don’t have the patience for manual methods. Prospective beginner sharpeners on a budget would do well to begin with a good-quality pull-through sharpener and work their way up.
How can I tell if my knife is sharp?
The tomato runs through the knife like cream cheese, absolutely no pressure needed; just let the weight of the blade do all the work. You could also try paper slicing the knife should make sharp cuts without a hack job. When it does these tasks without effort, your knife is sharp enough. Over-sharpening wastes your blade.
Is it possible to ruin my knives by sharpening them incorrectly?
Yes, bad sharpening can chip blades, leave uneven edges or take off too much metal. But the best knife sharpener for novices will have guides that help to eliminate most of the errors. Read instructions thoroughly, and apply light pressure, while checking your progress often. Nearly all beginner mistakes are correctable with a good resharpening.
Wrap Up: Deciding the Best Sharpener for You
Of course, the ideal knife sharpener for beginners will depend on your needs and budget as well as your patience level. Pull-through sharpeners give you the lowest point of entry to the honing game, with some good results to boot. For those people who are just too impatient, the electric models deliver speed and consistency at a price. Whetstones pay off for those willing to master the technique by yielding superior edges.
Begin with a good beginner model that matches your comfort zone. Do not rush out and spend lots of money on new equipment. Again, many good cooks keep great knives perfectly sharp with an unsexy $30 sharpening routine for years.
Whichever sharpener you select, practice regularly with it. It’s not about having the perfect tool, but using it consistently. And a simple sharpener, used properly, does better than an expensive one that’s collecting dust in your cabinet.
Sharp knives make a world of difference in cooking. They speed up prep work, make it safer and more fun. One of the best decisions any home cook can make is investing in a good sharpener and learning how to use it. If you’re looking for professional knife sharpening services or want to learn more advanced techniques, there are excellent resources available.
Take your time deciding, read reviews and think about starting with a mid-range choice. You can always upgrade later when your skills and circumstances have evolved. For more information about different knife sharpening methods and techniques, the Serious Eats guide to knife sharpening offers comprehensive insights. What matters most is starting your sharpening journey today, instead of making do with dull blades in the meantime.
Your blades should be treated with proper care, and you deserve the satisfaction of working with truly sharp tools. Choose a beginner-friendly sharpener, get used to the basic techniques and savour the difference it makes when you have sharp knives in your kitchen.