Fixes for a Blade That Won’t Cut
Nothing lets the air out of your tires more than grabbing that favorite knife, saw or cutting implement, only to find you need a new blade fix – right now. A dull knife not only takes longer to work with but actually makes every task more straining and even dangerous. When you have to push harder to get through a cut, you’re more likely to slip and cut yourself.
The good news? The complications most often have simple remedies you can try at home. Whether it’s a kitchen knife, utility blade, lawn mower blade or power tool that has lost its sharp edge, you can bring it back to life in six quick fixes. You don’t need an expensive set of tools to get these repairs done, or any professional skills whatsoever.
So, let’s get to the actionable tips to not only save you time, but money.
Why Your Blade Stops Cutting
Before we start covering methods for fixing a dulled blade, it would be good to understand why blades develop the dullness factor. Metal blades eventually become dulled from consistent use. The cutting edge wears down or gets small chips that you may not be able to see at all.
Wetness begets rust, which gnaws away at the metal. The edge will wear down much quicker when you cut through hard materials like cardboard, rope or thick branches than cutting soft materials. Sometimes the surface of the blade can become dirty or sticky, making it appear duller than it actually is.
And knowing the cause helps with getting the right fix.
Fix #1: The Deep Clean
Sometimes your knife simply isn’t dull — it’s just dirty. This is the simplest blade repair to attempt first.
What You’ll Need
- Warm soapy water
- Old toothbrush or scrub pad
- White vinegar or rubbing alcohol
- Clean towel
Steps to Clean Your Blade
Take off the visible debris first. Soak the blades in warm water with a little dish soap and scrub off any grease, sap or food. An old toothbrush is good for working into grooves and corners.
For harder gunk: submerge blade in white vinegar for 10–15 minutes. The acid removes residue from the metal without harming it. Scrub again, then rinse thoroughly.
Dry the blade thoroughly using a fresh towel. Because moisture left on metal equals rust, which will also dull your blade that much faster.
This simple cleaning will often bring back 30-40% of your blade’s cut.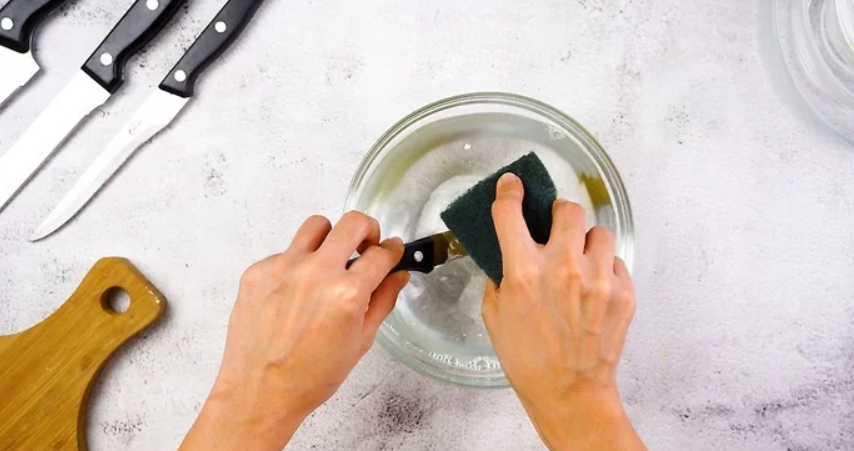
Fix #2: Sharpen It with a Whetstone
A whetstone is one of the oldest and reliable tools of blade fix jobs. These flat stones are available in various coarseness levels to hone and polish any type of metal.
Choosing the Right Grit
- 200-400 (Coarse): Very fast cut and stock removal, good for coarse grinding of tools and removing chips
- 800-1000 (Medium): Quick sharpening with great finishes, fine cutting edge
- 3000-6000 (Fine): Final polish, mirror finish, ultra-sharp edge
How to Use a Whetstone
Spritz the stone with water or soak it in a bath of H2O for 10 minutes if it’s a water stone. Oil stones require a few drops of honing oil in place of water.
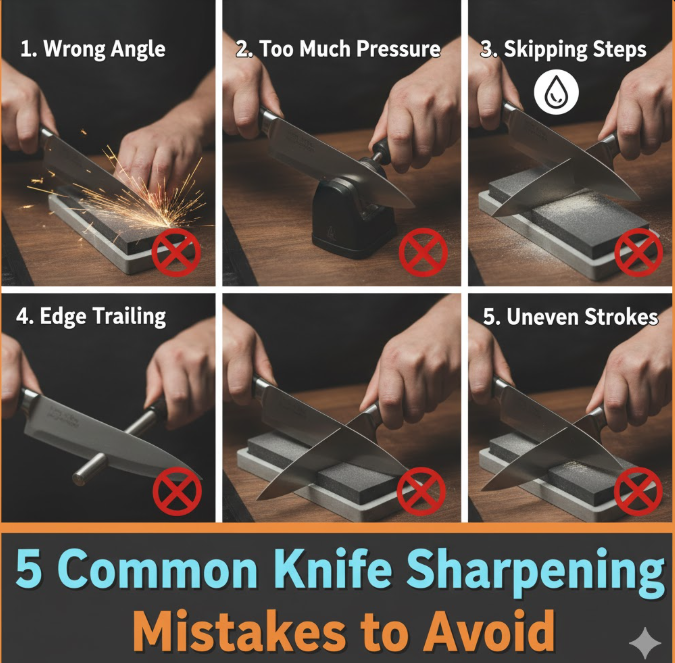
Place the edge of your blade on the stone at a 15-20 degree angle. This angle is important — too shallow, and you are not sharpening; too steep, you will damage the edge.
Drag the blade along the stone in one smooth movement from heel to tip. Complete 10-15 repetitions on one side and then flip over to repeat on the other side. You should get a bit of a burr (negative edge) forming — that’s good, it means it’s doing the job.
Move to a finer grit stone to sharpen and polish the blade. Wash the blade and try it on paper. A good sharp blade will cut through effortlessly!
Fix #3: Speed Sharpen with a File
When you’re in the garage or workshop, needing a quick blade fix, that’s where metal file comes in. This works really well on large sized blades such as lawn mower blades, axes, and machetes.
File Selection Matters
For general blade work, use a mill bastard file. It is of medium-coarse teeth that efficiently cut metal without being over aggressive. To keep gullet clean, brush metal filings out between strokes.
Filing Technique
Clamp your blade in a vise if possible. This frees up both hands, and the work becomes safer.
Keep the file at the same angle as your blade’s current bevel (which is likely to be between 30 and 40 degrees for a heavy-duty tool). Only drag the file over the blade edge in one direction. If you have to lift and reset for every stroke, then your control can be better.
Work from the tip of the blade to heel, making sure that your strokes are consistent. You can watch fresh shockingly bright metal emerge as you rub off the dulling surface layer.
Sharpen the other side in the same manner. Feel for sharpness by very carefully running your thumb across the width of the edge (not along it). You should feel a sharp edge, not a curved side.
Fix #4: Using a Handheld Sharpener
Handheld sharpeners provide the fastest blade fix for kitchen and pocket knives. And these are small tools that slide into a drawer and will take only seconds of anyone’s time.
Types of Handheld Sharpeners
Pull-Through Sharpeners: Pull-through sharpeners have pre-set angles with carbide or ceramic components. You just run the blade through the slot a few times. They’re quick, but take out more metal than other methods.
Rod Sharpeners: These sharpeners appear as a pen with a ceramic or diamond coated rod. To use, you tilt it and run the blade across the rod. These offer more control over the angle.
V-Sharpeners: V-sharpeners have two rods in a V shape. You drag the blade through the middle, and it sharpens both sides while you’re at it.
How to Use Them
Read the manufacturer’s instructions — every design operates a little differently. As a general rule you’re looking at 3-5 passes through a sharpener that draws through or 10-15 strokes on each side of the blade with one that doesn’t.
Apply light pressure. Let the sharpener’s design take care of it. Applying too much pressure damages both the tool and your blade.
Test frequently. They move so quickly that it’s easy to over-sharpen with the tools.
Fix #5: Clear Rust and Corrosion
Rust doesn’t just look unsightly—it actually impedes your blade’s ability to cut properly. This blade fix is to help with the chemical part of getting our blades back in shape.
Materials You’ll Need
- White vinegar or naval jelly iron oxide remover
- Very fine (0000 grade) steel wool
- Baking soda
- Protective gloves
Rust Removal Process
For light rust: Mix baking soda and water to a paste. Work it into the rusted patches with steel wool, using small circular motions. The gentle abrasive action will remove rust and won’t scratch a metal surface the way harsher abrasives can.
Heavy rust needs stronger treatment: Soak blade in white vinegar for 30 minutes to an hour. The acetic acid dissolves rust. Check every 15 minutes, and scrub with steel wool.
Commercial rust removers like naval jelly work well on severely rusted blades. Read product instructions carefully and work in a well-ventilated space.
Once all rust is removed rinse well, dry thoroughly and add a light oil to stop new rust from forming.
| Rust Level | Time of Treatment | Successful Removal Ratio |
|---|---|---|
| Surface spots | 5-10 minutes | 95% |
| Moderate rust | 30-60 minutes | 80% |
| Deep pitting | 2-4 hours | 50% |
Fix #6: Straighten/Re-set a Bent or Blunt Blade
Sometimes the issue isn’t dullness — the blade has simply become bent or chipped. This blade repair is fiddly but could save you a new one.
Straightening a Bent Blade
The curves of thin blades can often be removed without damage. Put the blade on a solid/smooth surface. Give the bend a little love tap with a rubber mallet. Just tap a little bit at a time and proceed very slowly, checking your progress after each hit.
For utility knife or razor blades it’s generally not worth the effort to straighten. These are not really intended to be repairable and it can actually be dangerous to attempt repairs.
Dealing with Chips and Nicks
Little tiny chips can be ground out with careful filing or stoning. You will need to grind back (remove metal) from the entire edge but just as far as you need for the lowest part of the chip. This makes the blade marginally shorter, but restores a usable edge.
Deep chips are typically a job for your mechanic. These blades should be professionally sharpened or replaced.
When to Repair vs. Replace
Some damage can’t be repaired safely. If you have deep cracks, more than a few large chips or severe warping, it’s time for a new blade. It’s not worth injuring yourself simply for the sake of using a damaged blade.
Keeping Your Blade Sharp Longer
The best blade fix is to keep the edge from getting dull in the first place. These easy practices will save you time between sharpenings.
Store blades properly: Store them in a knife block, on a magnetic strip or in blade guards. Loose blades rattle around in drawers and get damaged fast.
Use the proper tool for the job: Do not cut cardboard or open packages with your good kitchen knife. Get a separate cutting knife for rough work.
Clean after each use: Food acids and sap damage the metal. Quick rinse and dry takes 30 seconds but saves hours of rust removing later.
Cut on appropriate surfaces: Glass and ceramic cutting boards will dull your knives in no time. Opt for wood or plastic boards.
Hone regularly: A honing steel does not, in fact, sharpen — it realigns the edge of the blade. Use it for 30 seconds before every use to ensure sharpness between actual sharpenings.
For professional knife sharpening services, you can also consult experts who have the right tools and expertise to restore even the most damaged blades.
Safety Tips for Blade Maintenance
Especially when working with sharp things, we have to be respectful and careful. Follow these guidelines every time you try to fix a blade.
Never test the sharpness with your fingers along the edge. Instead, touch gently back and forth across the edge or do a test on paper.
Wear cut-resistant gloves for large blades or extensive sharpening. Your hands will invariably tire, and this is the point when mishaps occur.
Work in good lighting. It’s important to be able to see clearly what you’re doing in order to hold the right angle and not cause injury.
Secure blades properly before sharpening. A blade that shifted while you sharpened it could lead to painful cuts.
Keep first aid supplies nearby. Even experts occasionally nick themselves. Bandages and antiseptic on hand means immediate treatment, if necessary.
Frequently Asked Questions
How often do I need to get my blades sharpened?
Regular household use of your kitchen knives will require a sharpen every 2-3 months. Professional chefs sharpen weekly. Things like axes and lawn mower blades that live outside should be sharpened 2-3 times per season. Look for performance — if it takes more pressure to cut through things, the blade probably needs sharpening.
Can I over-sharpen a blade?
Yes. Each and every time you sharpen a knife, you remove metal from the blade. Too much sharpening causes the blade to wear away more quickly and can leave it cut too thin to be effective. You want to sharpen only when the performance degrades, and not even on any specific schedule.
Between honing and sharpening, what’s the difference?
Honing realigns a blade’s edge without removing any metal. Sharpening removes metal to form a new edge. Hone often (even daily for kitchen knives) and sharpen occasionally when honing no longer gets it done.
Why does my knife go dull again so soon after I have had it sharpened?
This can generally mean you didn’t sharpen the blade well enough, you’re coming from too steep or shallow an angle or that your material is a little too hard for the knife. The quality of the blade matters as well — cheap steel will not hold an edge very long.
Should I bother trying to fix old rusty blades?
Dependent on blade value/rust. Decent quality knives, or specialty tools like that, are worth reconditioning. Surface rust you can easily fix. Deep pitting or rust that has eaten through the blade suggest replacement would be preferable.
Conclusion
A blade that can no longer hold an edge should not have to be sent packing. These 6 blade fix methods offer practical remedies for virtually any cutting tool woe. Begin with the free stuff, which is cleaning; it’s also more powerful than you might think. Then move onto the sharpening techniques that are appropriate for your skill and tools.
Most blade issues can be avoided with regular maintenance. A little bit of attention after each use and your blades will perform well for years. A great investment otherwise you are losing time and money replacing tools unnecessarily because they are too dull to use.
The secret is catching the blades’ problems as early as possible. Do not wait until you can’t cut butter with your knife or until your lawn mower rips rather than cuts grass. A fast blade-fixing session every couple of weeks is all it takes to keep all your cutting tools in peak condition.
For more detailed information on proper knife care and maintenance techniques, check out this comprehensive guide from Serious Eats on knife sharpening.
Choose one approach in this guide and try it today. You will be surprised what a sharp blade can accomplish!