Introduction: Why Keep Knives Razor Sharp
Have you ever tried to cut a tomato only to watch it get smashed? That’s what happens when your knives go dull. Knife sharpening tools help keep knives in good shape, and knife handles come in different shapes to choose from. A dull one will need more pressure and is more prone to slipping, which can result in accidents.
Sharp knives are essential for quick, clean, and fun food preparation. They slice through food with ease, maintain the integrity of your ingredients and make you feel like a pro in the kitchen. The good news? You don’t have to be a chef or spend a bunch of money to keep razor-sharp blades. In five easy steps, you’ll keep your knives working like new for years.
Here in this guide we are going to take you through everything you need to know about maintaining your knives. From honing versus sharpening to storing your blades properly, these tips will elevate the way you care for your kitchen tools.
Step 1: Learn to Regularly Hone
What Honing Actually Does to Your Blade
A lot of people think honing is the same thing as sharpening, but that’s not the case at all. Honing does not actually remove metal from your knife. Rather, it straightens out the folds in the microscopic edge of the blade that comes from normal use. Consider it a form of hair combing — you’re simply re-establishing things that have been disrupted.
A honing steel (it gets mislabeled as a sharpening steel, which is misleading) should be your next best friend in the kitchen. Professional cooks hone their knives each time they use them. You don’t need to go that far, but your blades could use a good honing once a week, and you’ll be surprised how sharp and ready they are for action.
How to Properly Hone Your Knives
And here’s an easy one anyone can do:
Hold the honing steel straight up and down with the tip on a cutting board or towel. Place your knife against the steel at a 15-20 degree angle. This angle is important—imagine you’re attempting to cut off a thin slice of the steel.
Sweep the knife down and along the steel, from heel to tip. Apply light, consistent pressure. Repeat this five or six times on one side of the blade, then flip the knife and switch sides with each stroke.
The whole process takes less than 30 seconds once you’ve got the hang of it. You’ll notice your knife is sharper because it slides through food more easily.
Choosing the Right Honing Steel
Not all honing rods are created with equal quality. Most kitchen knives are fine with standard steel rods. Ceramic steels are harder and may have a slight sharpening effect in addition to honing. Diamond-coated steels are the most aggressive, removing actual small amounts of metal.
For novices, a 10-12 inch long steel rod works well. Be sure it is longer than your longest knife blade’s length for the sake of safety and practicality.
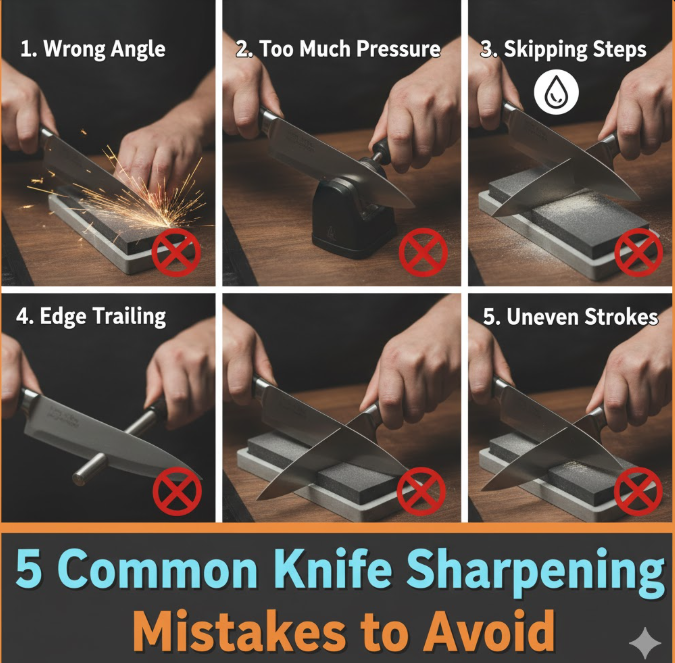
Step 2: Honing Matters, But Sometimes It Pays to Sharpen Your Knives
Knowing When to Sharpen
Even with routine honing, every knife eventually requires sharpening. How do you know when? Try the paper test. Take a piece of paper and hold it vertically, now try to cut the paper using your knife. Sharp blade, cut paper without effort. If it tears, or won’t cut, it’s time to sharpen.
For the average home cook, knives need sharpening every three to six months, but this can vary based on how often you cook. If you cook regularly, you will probably need to sharpen more often; if less frequently, then once or twice a year.
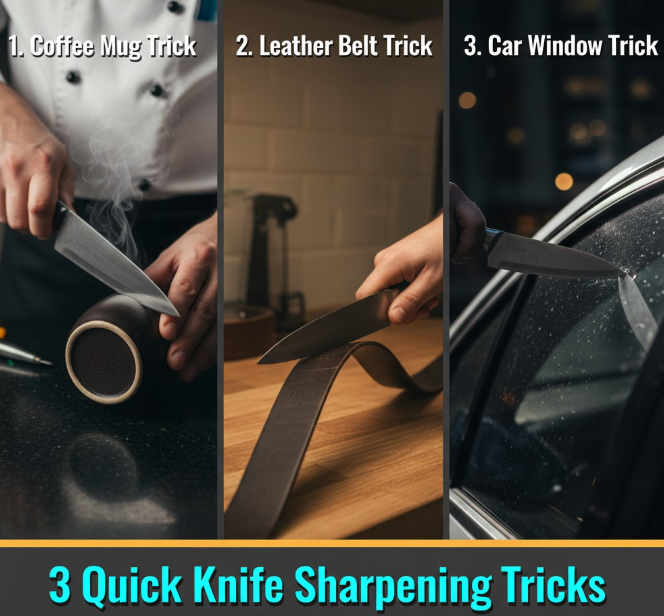
Three Ways to Keep Knives Sharp After Sharpening
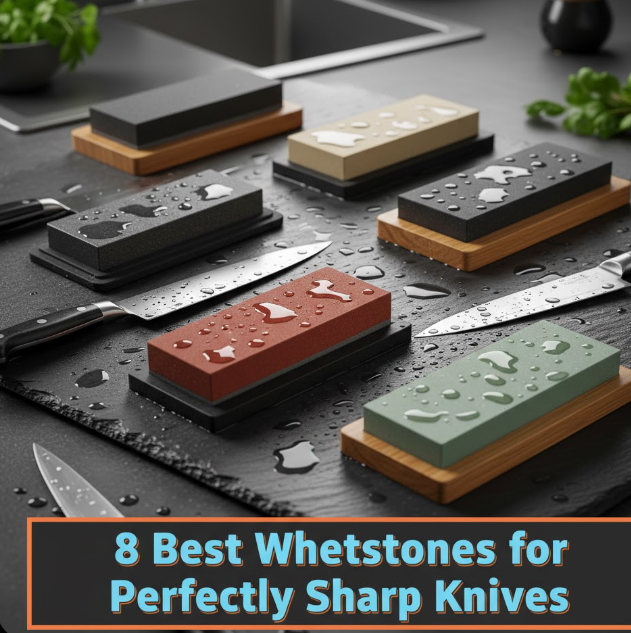
Water Stones (Sharpening Stones or Whetstones):
Having the most control and the best result is what you get with whetstones. They’re available in different grits — lower numbers (400-1000) for fixing a damaged blade and higher numbers (3000-8000) for fine polishing.
Soak the whetstone in water for 10-15 minutes until it becomes soft before you use. Set it on a moist towel so that it doesn’t slip. Keep the knife at a 15- to 20-degree angle and push it across the stone, applying even pressure. Work from the base to the tip to do the entire edge. Get 10-15 strokes on each side, then switch to the finer grit stone and polish up that edge.
Pull-Through Sharpeners:
These are great, easy to use entry points with no learning curve. You just pull the knife through preset slots at the appropriate angle. They’re quick, easy and take virtually no skill.
But pull-through sharpeners take off more metal than they need to and won’t give you the same rigid control that whetstones do. They’re great on your regular kitchen knives, but they aren’t necessarily the best for expensive or super-specific blades.
Electric Sharpeners:
Another middle ground between a whetstone and a manual pull-through sharpener, is the electric sharpener. They are fast and efficient with regular results. Many have multiple stages — coarse sharpening, fine honing and polishing.
The downside? They’re pricier and take off metal more quickly than manual options, which can reduce your knife’s life if used too frequently.
Sharpening Angle Chart
| Type of Knife | Recommended Angle | Use Type |
|---|---|---|
| Japanese knives | 12-15 degrees | Professional cutting, slicing |
| Western kitchen knives | 20 degrees | Basic cooking tasks |
| Pocket knife | 22 to 25 degrees | Outdoor and DIY |
| Cleavers | 25 to 30 degrees | Forceful chopping |
Step 3: Learn How To Store Your Knives Correctly
Why Storage Matters
You can keep your knives perfectly sharpened, but if you throw them loose in a drawer, alongside other utensils they’ll be dull before long. Metal grinding into metal destroys that sharp edge you put a lot of work into making. The right storage option can protect your investment and ensure those edges stay working sharp.
Get the Best out of Knife Storage for Sharp Knives
Magnetic Knife Strips:
These strips are awesome for having your knives in reach and out of the way. They grip knives safely, never touching the blade to any surface. And they look professional and take up less counter space, to boot.
Place the strip at chest level or slightly below for convenience. Always pack up and take down knives gently to prevent damaging the blade on the magnetic board.
Knife Blocks:
If you have counter space, traditional knife blocks work fine. Search for blocks with horizontal slots over vertical ones. Vertical slots can wear the edge while you pull or slide the knife in and out. Horizontal slots, i.e. blocks where bone (rather than edge) sits against the slot are far superior.
Keep your knife block clean. The slots can get clogged up with crumbs or debris which will scratch your knives.
Drawer Inserts with Individual Slots:
If you like your counters to be clean, drawer inserts with individual compartments will keep each knife from touching the next. They’re cheap, and they keep everything organized.
Just be sure your drawer is deep enough to safely store the longest knife you have.
Blade Guards:
For knives that you use less frequently, or want to leave in the drawer temporarily, plastic or felt blade guards slide on over the edge to protect it. They’re affordable and do wonders for small kitchens, where space is at a premium.
Storage Mistakes That Dull Blades
Do not toss knives haphazardly into a drawer. Within a week, the roughhousing and banging against other utensils will ruin the edge. You will also want to refrain from standing knives on end in a container of other utensils. The knife weight constantly wearing against other tools creates microscopic damage that adds over time.
Step 4: Cut with the Right Methods and Surfaces
The Surface Makes a Difference
Where you cut on is every bit as important as how you sharpen. Your knives will go dull at a rapid pace when used on hard surfaces such as glass, ceramic, marble or metal cutting boards. This edge will chip with every contact with those surfaces, because the edge is meeting something harder than the steel on contact.
Wood or bamboo cutting boards work well. They are hard enough to stand up to heavy use, yet soft enough that they won’t dull your blade. The knife actually sinks in a little bit with every cut, resulting in a self-healing work surface that’s easy on edges.
Plastic cutting boards are also very practical and dishwasher-safe, which is perfect for busy kitchens. Choose the thick, strong kind instead of flimsy, easily warped versions made of thin plastic.
Cutting Technique Matters
The way you use your knife has an impact on how long it will stay sharp. Use a rocking or forward slicing motion only, and not chopping or hacking. Let the knife work; you should not have to push down hard to get through most ingredients.
For harder items like winter squash or sturdier vegetables, use the heel of your knife (the section closest to the handle), where you’ll have more leverage. It regulates the habit of pressing hard on its finer tip.
Never use your kitchen knives to open packages, cut cardboard or do anything they’re not meant for. Such activities will dull your blades in no time, and might even chip or shatter them.
Cutting Surface Comparison
| Type of Surface | Effect on Knives | Durability | Sanitation |
|---|---|---|---|
| Wood | Gentle, optimal | Long | Good (With care) |
| Bamboo | Gentle, eco-friendly | Very high | Good |
| Plastic | Moderate | Medium | Excellent |
| Glass | Severe dulling | High | Excellent |
| Marble | Severe dulling | High | Excellent |
| Metal | Severe dulling | Very high | Excellent |
Step 5: Keep Your Knives Clean and in Good Condition
How to Wash Your Knives Correctly
The golden rule for maintaining a sharp knife is to hand wash it. The dishwasher is so convenient, but so terrible for knife edges. The handle becomes dull, looking worse and potentially being harmed by the combination of high heat, abrasive detergents and jostling against other items.
Wash your knives right after use with warm soapy water. Don’t let them lurk in the sink where they can get covered by other dishes — which is dangerous and can result in accidental cuts. It also makes the blade get wet a lot more often, which leads to corrosion.
Dry your knives thoroughly immediately after washing. Moisture that remains on the blade, particularly around the handle, can result in rust spots or corrosion (depending on your knife’s steel type).
Preventing Rust and Corrosion
The majority of kitchen knives today are made from stainless steel, which is rust resistant. But high-carbon steel knives (which hold an edge longer) are prone to corrosion.
For high-carbon knives, rub a thin coating of food-safe mineral oil over the knives after washing and drying them. This forms a natural barrier against moisture. Wipe off any oil excess with a clean cloth.
Do not leave knives wet or in a damp state. If you live in a humid area keep silica gel packets in the drawer with your knives or nearest your knife block to suck up excess moisture.
Regular Maintenance Checklist
Here’s a simple routine to keep knives sharp for years:
Everyday: Rinse and dry your knives as soon as you use them. Hone if you use it often.
Once a week: Hone your most-used knives in a quick session. Inspect for any food remnants on the handle and clean it properly.
Monthly: Look at all of your knives for damage, rust spots and problems with the handle. If available, tighten any loose handles on the hand tools you need.
Every 3-6 months: Sharpen your knives however you like to sharpen your knives. Clean out your knife storage (blocks, magnets or drawers) of any crumbs.
When to Seek Professional Help
Occasionally, no matter how hard you try to avoid letting knives lose their sharp edge, they require a professional touch. If you have seen nicks in the edge of your blade, if the edge is really damaged or even if your knife just won’t respond to your care with a home sharpening system then it’s time to go see a professional knife sharpening service.
Sharpening services are available at many kitchen supply stores. Knife sharpening services using specialized equipment can repair your knife. This service usually runs $5-10 for a single knife and is good protection for your quality blades.
Frequently Asked Questions
How long can I go between sharpening my kitchen knives?
For most home cooks, they should sharpen their knives every 3-6 months with normal usage. If you are a daily cook, you will have to sharpen every 2-3 months. The paper test is a good way to determine whether sharpening is needed — if your knife isn’t cutting cleanly through paper, it’s time.
What is the difference between honing and sharpening?
Honing basically straightens the edge of the blade without removing metal from it, sharpening actually removes metal to form a new edge. Just think of honing as some weekly upkeep, and sharpening instead like a reset three to five times per year.
May I put my knives in the dishwasher?
Quality knives should never go in the dishwasher. The blade will lose its edge if exposed to heat, harsh detergents and constant movement; it may also damage the handle. Knives should always be washed by hand right after use and dried completely.
What is the correct angle to sharpen your knives?
Western kitchen knives usually require a 20-degree angle and Japanese ones at 15 degrees. When in doubt, though, trust the manufacturer’s advice. For most pull-through and electric sharpeners, angles are set for you so don’t concern yourself with this.
Will high-priced knives hold their edge longer?
More expensive knives usually have better steel, which holds an edge longer. But even costly knives still require maintenance. The only difference is that good knives will take an edge better and last a hell of a lot longer than the cheap ones.
Can a whetstone be better than an electric sharpener?
Whetstones offer more control and take off less material, which is why they work well with quality knives. Electric sharpeners are quicker and more convenient but may grind off more metal with each use. Both work to keep knives sharp — decide depending on your skill level and how much time you can spare.
Why does my knife seem so dull?
Fast dulling is typically the result of improper storage (if your blades are bumping up against other metal instruments), cutting on hard surfaces like glass or ceramic, or using the knife for applications it wasn’t designed for. Taking these five steps will significantly improve your knife’s edge holding performance.
Can I sharpen serrated knives myself at home?

Serrated knives are also more difficult to sharpen than straight-edge blades. Sharpening those serrations can be done only with special tools or special techniques, to sharpen up each serration individually. It’s often best to send serrated knives out for sharpening by a professional or to buy new ones when they become very dull.
Conclusion: Your Way to Forever Sharp Knives
There’s no need to be a pro or spend a fortune to sharpen your knives. By doing these five simple things—we’re talking about regular honing, occasional sharpening, proper storage, using the correct cutting surfaces and how to clean your knives—the blades in your knife block will stay razor sharp so that meal prep is easier and safer.
Remember that consistency is key. All it takes is a couple of minutes’ maintenance a week to save hours of kitchen frustration. A sharp knife cuts preparation time, lessens cooking stress and helps you make meals that you will actually enjoy. They’re also a whole lot safer than dull blades that slip and take too much force.
Start implementing these habits today. Start with good storage if you’re currently throwing knives into a drawer. Build in some weekly honing. When your knives begin struggling to slice through paper, set aside a few hours to sharpen them.
Your knives are an investment in the future of your cooking. Take care of them, and they will serve you faithfully for decades. The pleasure of slicing through a tomato with no effort or dicing an onion in seconds is enough to make the maintenance worth it. For more expert tips on proper knife care and maintenance techniques, keep your knives sharp and they’ll keep your kitchen churning for years.