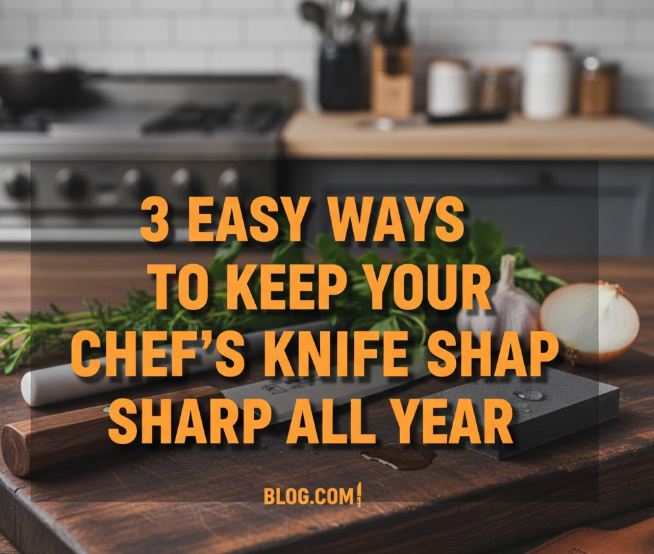
Introduction
There isn’t a chef on the planet who has not known the frustration of a dull knife. It skids, rips tomatoes apart instead of slicing them, and turns even basic prep into hard labor. But the secret is that most dull knives aren’t actually dull at all — they just need to be honed properly.
Knife sharpening skills are the bread and butter of knife maintenance, those which separate the men from the boys in the kitchen! While sharpening actually removes metal to form a new edge, honing simply realigns the tiny teeth that line your blade and get bent out of place during regular use. Think of it as brushing tangled hair back together, rather than cutting it off.
If you’re cooking at home or in a restaurant kitchen, knowing these techniques will change the way you cut. Your knives will slice through food like a dream, your prep time will go down, and you won’t actually mind cooking anymore.
This guide covers eight professional knife-sharpening techniques that anyone with a little practice can master. Whether you use the traditional honing steel technique or our simple draw through sharpening guide, we’ve got you covered.
Why Sharpening Your Knife Is More Important Than You Think
While most people use the terms honing and sharpening interchangeably, they are doing very different things. Sharpening wears away metal to make a new edge — and is something you likely have to do only a few times each year. Honing, however, will need to take place before just about every use.
Here’s what happens when you forgo honing. As you cut, the edge of the blade bends microscopically either to one side or the other. Since this edge isn’t perfectly straight, the knife feels dull even though the edge is still sharp. Food starts to stick to that blade and the cuts get sloppy, and you’re pressing harder.
Honing is gonna prevent all of that. Straightening out the edge to return it back to its original alignment—the straightened edge allows for even cutting. Professional cooks will sharpen their knives several times a day. Home cooks should hone at least once a week on knives that are used most often.
The benefits extend beyond performance. In fact, good honing also makes the time between sharpenings longer — which is good for your knife. It removes less metal throughout the knife sharpening process, extending life of the blade, and adds years of performance to your knives.
The Traditional Steel Rod Method
This is the most popular method used to sharpen knives. You’ve seen the chefs do it — quick swipes against a long steel rod, making that characteristic ringing noise. It looks intimidating, but the fundamentals are easy.
Hold the steel vertically pointing tip-down on a cutting board or towel. Grasp the handle hard at the upper part. Hold your knife against the steel at a 15–20 degree angle, match up with the back of the blade closest to the top of your rod.
Drag the entire length of blade away from your body in one fluid motion across the steel, and then pull it towards you. The entire edge should come into contact with the steel, so that the knife edge ends with the point at the base of the rod. Repeat this five to ten times on each side, alternating sides.
The key is consistency. Keep that same angle up and on every stroke. Too acute and you’ll ruin the edge. Too shallow and nothing happens. Most people find 15-20 degrees by holding the knife to be perpendicular at 90-degrees to steel and then cutting that angle in half…twice.
Safety Precautions for Honing With Steel Rods
Always sharpen away from your body and fingers, and use a cut-resistant glove. Begin to do this slowly until it starts feeling natural. But speed comes through practice and accuracy. Gameplay over flash, always.
Ceramic Rod Precision Technique
Ceramic honing rods are harder than steel, so they’re perfect for straightening out sharpened blades. They are especially useful for knives made of harder steel that may not take well to old school steel rods.
This trick is very similar to the steel rod method with an important exception: gentler pressure. Ceramic is also harder than metal, so if you get a bit heavy-handed nice little chips can flake off your blade. Think of it as more like a gentle realignment, not aggressive straightening.
Position the ceramic rod at a comfortable angle — many professionals prefer something like 45 degrees, against a countertop, as opposed to vertical. This allows more control over pressure and angle. Use slow, steady strokes applying a light pressure that enables you to feel the blade moving across the ceramic.
The benefit of white ceramic rods is that they tell you exactly when the blade touches! Dark streaks pop on the surface of the rod, indicating if your angle remains true. This real-time feedback can enable beginners to learn the proper technique more quickly.
For best results, use ceramic rods on knives with a hardness of 58 or above on the Rockwell scale. Steel rods are better for softer knives, which means you’re better off using a ceramic rod to maintain harder Japanese-style blades.
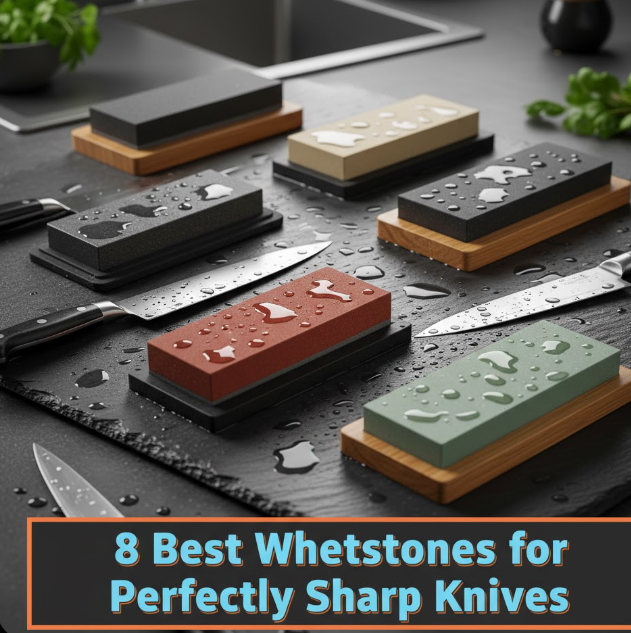
The Flat Stone Stropping Approach
Stropping isn’t just for straight razors — it’s one of the best ways to get your knives as sharp as the pros. It is the way in which this aesthetic is achieved; merely by buffing and straightening the edge using a flat leather (or compounded) medium.
Begin with a leather strop or scrap of thick leather that can be secured to a flat board. If you happen to have some honing compound, use a thin layer (but plain leather also works). Lay the knife blade away from you on the strop edge trailing.
Pull the knife back over the strop, while using enough pressure to ensure that the entire edge makes contact with it. Do not push the edge against the leather – always pull away. They keep from cutting the strop and are in the right spot. Apply little pressure and allow the leather and compound to do their job.
Do 10-15 passes on each side, switching off every stroke. The rhythm should be almost meditative — smooth, controlled and rhythmic. You are honing the edge as well as removing any burrs left from previous sharpening.
Compound Selection Guide
Green compound is ideal for general honing and maintenance. White compound provides even greater polishing for gold class finish. Moderate between the two is a black compound. When in doubt: begin with green.
Angle-Guided Modern Systems
Thanks to technology, guided knife sharpening systems have brought manual techniques into the 21st century. These are also “no-brainer” tools, which provide fixed angles and thus allow professional results for everybody.
Guided rod systems have fitting slots or grooves to keep the honing rods at desired angles. All you have to do is slip your rod through it, place your knife on it and start stroking. The system enforces consistency even if you’re a beginner at honing.
The main advantage is repeatability. Every stroke is at the same angle so you have even lines every time. It’s that kind of consistency that is important for kitchen knives, especially high end ones when the degree of precision can be the difference between good and great performance.
Setup takes seconds. Most systems attach to your countertop or have non-slip bases. Select the angle slot that corresponds to your knife’s edge (typically 15 degrees for Japanese knives, 20 for Western styles). Then hone as normal.
One caveat: these systems are most effective with standard knife profiles. Curved blades or funky designs just won’t work. For specialty knives, you usually get better results with the traditional freehand approach.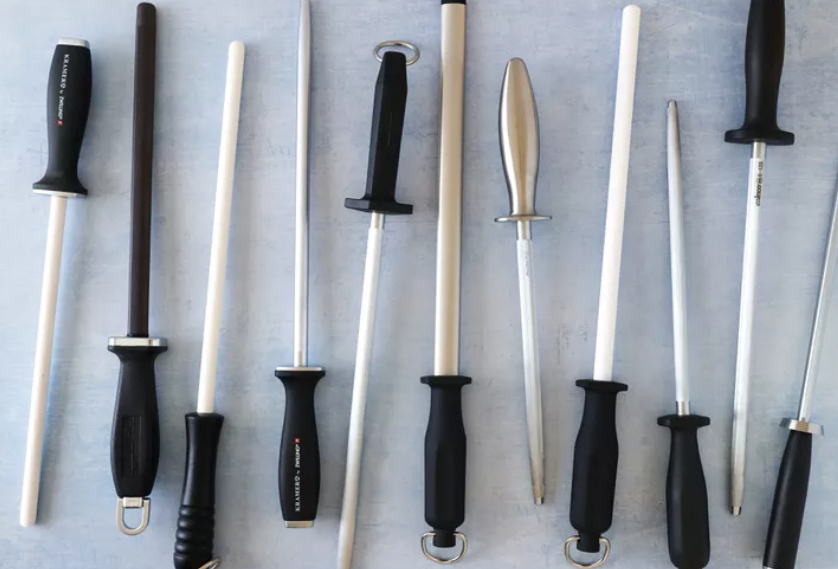
The Professional Chef’s Speed Method
Now watch the kitchen of a busy restaurant and you’ll see cooks sharpening knives at breakneck speeds that seem almost impossible. This method is all about speed without compromising on quality, which is perfect for when you need to touch up edges in a quick service.
The trick is economy of movement. Instead of working full-length strokes, they make short, fast passes concentrating on the areas of the blade that need it most. The section of most knives you use most is the middle, which thus requires alignment more often.
Position the steel in front of you, parallel to the ground and at chest level. Do this quickly, switching back and forth three to five times on each side. The knife hardly feels as though it is touching the steel at all, and yet the edge suddenly comes alive. This takes a bit of practice, but it will save you a ton of time.
It’s not just how you do it but when. Professional cooks intuit when knives should be honed. A tomato that needs to be sawed rather than sliced clean? It’s time. Bad news — when onions tear rather than separate cleanly it means the edge has rolled.
Make this part of your cooking habits. Hone the blade before beginning prep work, again for tough ingredients and once more after you’re done and ready to store it. These short maintenance sessions keep the edge from wearing away in these areas too much.
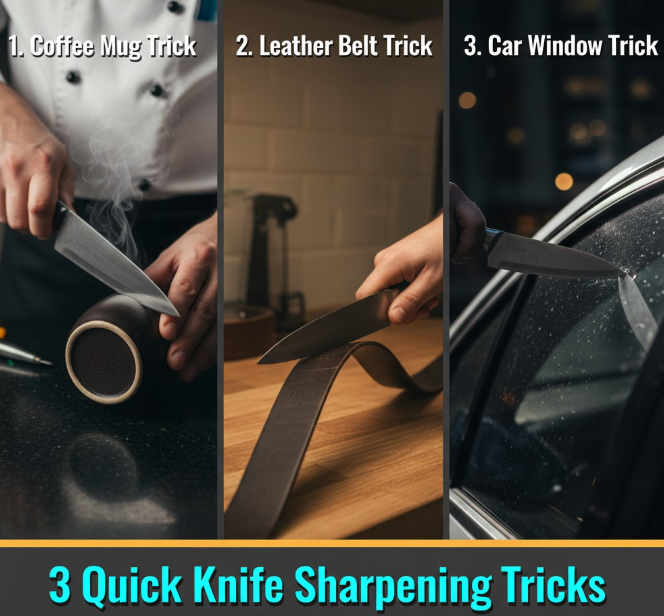
Leather Belt Emergency Fix
Ever needed to sharpen a knife and didn’t have any tools? With methods that can be applied anywhere, a used leather belt yields shockingly effective results.
Take off the buckle and pull the belt taut between your hands or fix one end to a fixed object. With smooth side up. Put your knife edge down with the spine following.
Draw the knife back down the leather with the same pulling motion applied in formal stropping. The belt’s flexibility is an advantage, really—it allows the belt to run true against the blade profile, while firm tools may miss areas. Make ten to fifteen passes per side.
This emergency technique won’t be an absolute substitute for proper, dedicated honing tools, but it certainly improves performance in a bind. Hikers, backpackers and campers frequently use this system for keeping their knives sharp outside the house. Have an old leather belt in your camping gear or vacation rental kitchen kit.
For best results, choose vegetable-tanned leather instead of chrome-tanned. The vegetable-tanned leather has the ideal balance of texture and stiffness for true honing. The smooth side is more effective than the rough flesh side.
Diamond-Coated Rod Refinement
Diamond rod sharpeners are the cutting edge of knife honing! These honing and slight sharpening tools are two in one, which makes them very efficient.
The diamond coating is very fine — far finer than what sharpening stones ever are. It cuts away tiny bits of metal while also straightening the edge, effectively giving you a combo of both processes. Diamond rods are perfect for keeping an edge between full sharpenings.
Use less pressure than you would use with steel rods. The diamond coating is so aggressive that heavy-handed strokes take off too much metal. It works better as increased honing than abrasive sharpening.
Start with just two or three passes on each side. Test the edge by gently running it across a sheet of paper or the skin of a tomato. If it still feels dull, two or three more passes. Diamond rods are quick, so less is definitely more.
These rods shine on very hard steels that won’t respond to standard honing. With diamond maintenance, high-end Japanese knives, custom blades using exotic polymers or other compounds in the metal, and ceramic knives do very well. There is no knife steel harder than diamond.
Comparison of Honing Methods
| Method | Ideal For | Skill Level | Speed | Cost |
|---|---|---|---|---|
| Steel Rod | Everyday upkeep | Beginner-Advanced | Fast | Low |
| Ceramic Rod | Hard steel knives | Intermediate | Medium | Medium |
| Flat Stropping | Polish and hone | Intermediate | Slow | Low-Medium |
| Guided Systems | Accuracy and efficiency | Beginner | Medium | High |
| Speed Method | Restaurant Back of the House | Advanced | Very Fast | Low |
| Leather Belt | Worst-case scenarios | Beginner | Fast | Very Low |
| Diamond Rod | Hard steels and speed touch-ups | Intermediate | Fast | Medium-High |
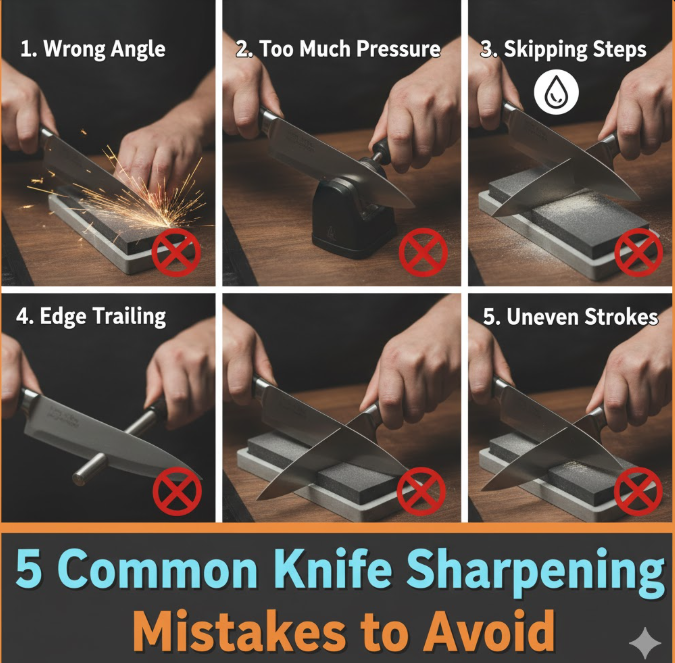
Mistakes That Dull Your Edge
These mistakes can also ruin your blades, even if you use the best knife honing methods out there. The most frequent mistake is applying too much force. The exercise should seem subtle — you are realigning, not grinding. Excessive pressure can fold or chip the blade.
And bad angles are much more trouble than they’re worth. Each stroke must be at the identical angle; otherwise you produce a wavy, useless edge. If you find your knife seems blunter after honing, chances are an angle issue is to blame.
The process of honing a dirty knife only spreads around food particles and grit, potentially causing microscopic damage to the blade itself. Be sure to always rid your blade of any residue each time you hone. A quick wash and dry takes five seconds but prevents hours of repairs.
Another error is honing too little or too much. Most home cooks are fine with a weekly honing, but some pros might hone several times a day. But overly honing on high-grit diamond rods can eventually take off too much metal.
The Right Honing Schedule
- Light users: Once every week with main knives
- Regular home cooks: Before each cooking session
- Professional chefs: Start of shift or as necessary
- Heavy use (Commercial Kitchens): Every 30-45 minutes during use
When to Sharpen and When to Hone
Knife honing skills do mitigate between-sharpening wear, but they don’t revive truly dull knives. Knowing the difference between sharpening vs honing will help save time and frustration.
The paper test shows the condition of your blade right now. Take a piece of paper and hold it vertically; then try to cut it in strips. A sharp knife glides through material easily and without need of excessive force. If the blade will not cut through the paper or tears it, that says to me you need sharpening and not honing.
Visual inspection helps too. Inspect the edge under strong light. A well-set edge reflects light evenly all the way down it. Bright spots or non-uniform reflections are evidence of rolled sections requiring intervention. But if the whole edge looks rounded instead of sharp, honing won’t help.
Touch (gently) can give you edge condition. Run your thumb lightly across the edge of the blade perpendicular — never parallel! A sharp edge in the right position grabs your skin a tiny bit. The dull edges are comfortable to wear without a catch. This is something that takes work but it does become reliable.
Stop once you have honed ten passes per side and no longer see improvement. You don’t really need to hone it any more, and you could potentially damage the blade. Time to go dust off your sharpening stones or visit a professional knife sharpening service.
Maintaining Your Honing Tools
Your honing gear requires a little upkeep as well. Metal particles, along with food and oil residue can build up on steel rods, decreasing their effectiveness. Wash them between uses with warm, soapy water and a soft cloth. Dry thoroughly to prevent rust.
Ceramic rods require gentler care. Never apply abrasive cleaners that could also ruin the finish. The dark metal marks that appear with use are helpful indicators, so don’t worry about total removal. It is very easy to clean with a damp cloth, no need for special cleaning methods.
Strops need re-compounding every few months and the leather ones might be even more tricky to deal with. Apply a thin, fresh layer as needed when the leather appears dry or the compound seems to be vanishing into the surface. Also, let it dry thoroughly before use.
Guided systems need occasional observation. Check angle slots have not deformed and clamps hold firmly. Loose parts diminish the accuracy that these systems offer. Tighten all loose screws and replace any worn parts if necessary.
Diamond rods have the longest lives when all is said and done. They don’t wear down like steel or ceramic; however, the diamond coating can dislodge if not stored properly. Store them in protective sleeves, wallets or cases. Do not leave loose in drawers where they will hit against other tools.
FAQs About Knife Honing Techniques
How frequently should I have my kitchen knives honed?
Home cooks should sharpen kitchen knives at least once a week for often-used blades. Most professional chefs sharpen at the beginning of each shift or as necessary throughout the day. When you perceive dwindling cutting response, it’s time to sharpen irrespective of regularity.
Honing and sharpening, what is the difference?
Honing realigns the edge of the knife without a significant amount of metal removal, while sharpening maintains an already sharp edge. The cutting edge is formed by removing metal – honing only maintains its ability to cut. Honing is like maintenance, whereas sharpening is more akin to restoration.
Can you over-hone a knife?
Yes, but it’s tough if you’re using traditional stainless steel rods. Honing too much (on diamond-impregnated rods or plates, perhaps), can take away metal repeatedly. With most knife honing methods — whether with steel or ceramic — you would need to do serious damage: eight hours of aggressive honing to be the culprit of destruction here. Normal use poses no risk.
At what angle should I hone my knives?
Most Western-style knives need 20-degree angles on each side. Japanese-style knives function best at 15 degrees. If in doubt, stick to the current edge angle — you do it by placing the blade flat against the honing rod and then lifting the spine until you feel that edge meets with your tool. That’s your angle.
Do more expensive knives require a different honing technique?
High-end knives will be made the same way, just with a more durable steel that withstands less pressure. Japanese high-end knives especially do well with ceramic or diamond rods as opposed to standard steel. The basic techniques are consistent throughout the different levels.
Why does my knife still seem dull even after I have honed it?
If honing doesn’t work, your knife needs to be sharpened properly, not honed. Honing can only be used with edges that are already basically sharp but out of alignment. A truly dull knife needs to be sharpened – you take metal off. Do the paper test: If a knife rips instead of slices, sharpen it. According to knife care experts at Sur La Table, regular sharpening every few months keeps blades in optimal condition.
Conclusion
When you know how to hone knives properly, your kitchen life will go from frustrating to heavenly. These eight approaches offer choices for every kitchen guru out there, from fast-and-dirty professional touch-ups in the heat of the busy cook’s battle to careful, meticulous precision work that’s designed to wring the maximum possible life out of any given edge.
The simplicity of properly honing is the beauty. You don’t need fancy equipment, and you don’t even have to train for years. But with a decent steel rod and your own five minutes of practice you’ll be dramatically better. From there you can move on to ceramic rods, stropping or a guided system and what suits your needs better.
Keep in mind, honing is not magic, it’s maintenance. It helps to keep sharp knives sharp, but it won’t fix truly dull blades. A routine honing, in conjunction with an occasional sharpening, is your best long-term solution. Your knives will be glad you did, giving you years of reliable service.
If you’re new to honing, begin with the classic steel rod method. Practice a few times slowly to get the feel of it, then add speed. Once you find your confidence, try other methods to see which one brings out the best in your knives and meets your cooking style.
The contrast between a well-kept knife and one that has seen heavy use isn’t just in cutting performance — it impacts safety, speed of work and even the sheer pleasure of cooking. Sharp knives mean faster prep, more professional results and a happier cooking experience all around. Spend ten minutes a week honing your knives, and you’ll regret that you ever cooked without developing this crucial ability.