If you’ve ever tried slicing tomatoes and the blade squashed them instead of cutting cleanly, or if your knife slides unpredictably while chopping onions, it’s a sign your knife is dull. And here’s the good news learning knife sharpening for beginners is not complicated, overwhelming, or dangerous. In fact, once you understand the basics, sharpening becomes one of the simplest and most satisfying kitchen skills you’ll ever develop.
At DTDF Knife Sharpening, our commitment is clear:
Simple, Safe Knife Sharpening — One Step at a Time.
This guide is designed specifically for beginners—no complicated terminology, no confusing angles, no chef-only techniques. By the end, you will know:
- The easiest tools to start with
- How to sharpen a knife using three beginner methods
- How to choose the right sharpening angle
- How to maintain your edge so your knife stays sharp longer
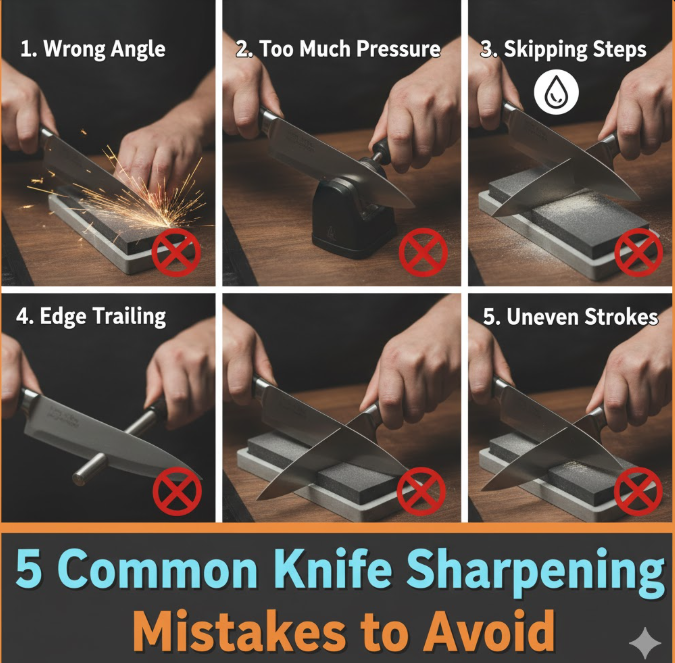
- The biggest beginner mistakes to avoid
- When to sharpen vs when to hone
Let’s begin your journey to sharper, safer, smoother cutting.
Why Sharp Knives Are Safer Than Dull Ones
Many beginners assume sharp knives are more dangerous.
In reality, the opposite is true.
A dull knife forces you to push harder.
When it slips—and it will—it causes deeper injuries.
A sharp knife:
- Cuts where you expect
- Requires less pressure
- Improves control
- Makes cooking faster and easier
Once you sharpen your knife properly for the first time, you’ll notice the difference immediately: smoother slicing, cleaner cuts, and far less frustration in the kitchen.
Knife Sharpening Tools Beginners Can Use
One of the biggest challenges when learning knife sharpening for beginners is choosing the right tool. You don’t need expensive equipment. Start with one of the four tools below.
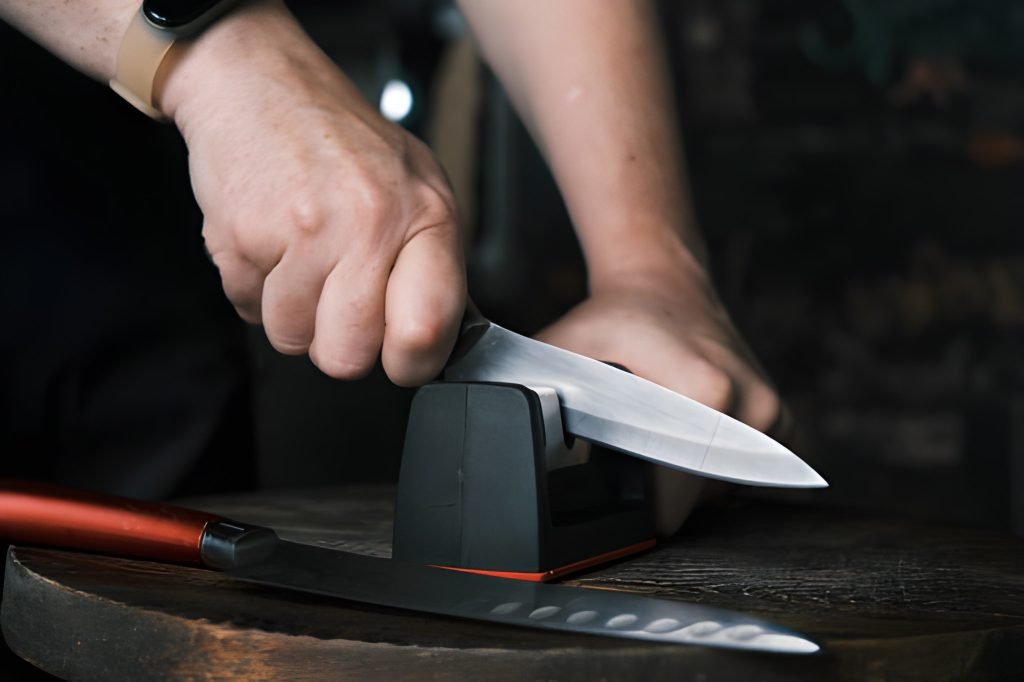
Manual Pull-Through Sharpener (Easiest Option)
This is the simplest tool for absolute beginners.
Pros:
- No angle calculations needed
- Fast and easy
- Great for home cooks
- Very safe
Cons:
- Not as sharp as whetstones
- Limited control
Rolling Sharpener (Beginner-Friendly + Consistent)
A rolling sharpener gives you more accuracy while staying easy to use.
Pros:
- Maintains a perfect angle
- Safe and controlled
- Better results than many manual pull-through sharpeners
Cons:
- Slight learning curve
- Requires a flat base
Whetstone (Best Long-Term Method)
This is the method professionals prefer—and the one that gives the sharpest results.
Pros:
- Sharpest possible edge
- Works on all knives
- Very satisfying to learn
Cons:
- Requires practice
- Needs correct angle and technique
Honing Rod (Not for Sharpening)
This is where many beginners get confused.
A honing rod does not sharpen a knife.
It simply realigns the edge to keep it sharp between sharpening sessions.
Use it weekly—especially if you cook often.
Choosing the Right Method as a Beginner
Here’s a simple guide:
- Total beginners → Start with Manual Sharpener
- Beginner who wants better results → Rolling Sharpener
- Beginner ready to learn a skill → Whetstone
- Everyone → Use a honing rod regularly
Let’s now walk through the actual sharpening steps.
Here’s a simple guide:
- Total beginners → Start with Manual Sharpener
- Beginner who wants better results → Rolling Sharpener
- Beginner ready to learn a skill → Whetstone
- Everyone → Use a honing rod regularly
Let’s now walk through the actual sharpening steps.
How to Sharpen a Knife With a Manual Sharpener
This is the simplest method for complete beginners.
Step 1 — Place sharpener on stable surface
Ensure it won’t move.
Step 2 — Insert knife into coarse slot
This stage removes dull metal and reshapes the edge.
Step 3 — Pull knife through 5–10 times
Use gentle pressure.
Pull in a smooth motion from heel to tip.
Step 4 — Move to fine slot
This stage polishes and refines the edge.
Step 5 — Pull 3–5 times
Light pressure only.
Step 6 — Wipe knife clean
Always remove fine metal particles before cutting food.
Your knife should now slice more smoothly.
How to Sharpen a Knife With a Rolling Sharpener
This method is popular because it gives near-professional results with minimal skill.
Step 1 — Place the knife on the base guide
The base controls the sharpening angle for you.
Step 2 — Roll the sharpener over the blade
Forward and backward, gently.
Step 3 — Cover the full length
Start at the heel, finish at the tip.
Step 4 — Repeat 10–20 passes
Adjust depending on blade dullness.
Step 5 — Switch to fine wheel
For polishing and smoothing the edge.
This method delivers a beautifully consistent edge ideal for daily cooking.
How to Sharpen a Knife With a Whetstone (Beginner Technique)
Whetstones give the sharpest results—but let’s keep the instructions beginner-friendly.
Step 1 — Soak the stone (if it’s a waterstone)
5–10 minutes until bubbling stops.
Step 2 — Set the stone on a towel or rubber base
Stability is essential.
Step 3 — Hold knife at 15–20 degrees
A simple guide:
- A thin Japanese knife → closer to 15°
- A thicker western knife → closer to 20°
A £1 coin under the spine is a useful beginner cheat.
Step 4 — Push knife forward across the stone
Edge-leading.
Imagine slicing a thin layer off the stone.
Step 5 — Repeat 10–15 strokes
Keep angle steady.
Step 6 — Flip knife and repeat
Balance both sides equally.
Step 7 — Move to finer grit
Same motion, lighter pressure.
Step 8 — Rinse and dry
Stone and knife must be fully dry before storage.
A whetstone takes practice—but the precision is unmatched.