Introduction: The Case For Both On Your Knife
At a time when we’re all spending more time at home and in the kitchen, there’s nothing worse than fighting with an un-sharp knife in the middle of chopping onions. But here’s something that a lot of people don’t understand: sharpening vs honing are actually two totally and completely different jobs that your knife needs done to both be in top performance.
These terms are thrown around by many home cooks as if they mean the same thing! They don’t. Think of it this way: if your knife were a car, honing would be regular maintenance like checking tire pressure, while sharpening would be changing the tires when they wear out. They’re both necessary, but they each have a different role.
In this guide, we will cover specifically what these two techniques are, when to use either one, and how to keep your knives performing like the day you bought them. Whether you’re just starting to cook or have been doing it for years, knowing this distinction will alter the way you use knives forever.
What Is Honing, and Why Does It Matter?
Honing is more like pulling a comb through your hair after you’ve made it messy. Your knife’s edge does not actually get dull from regular use it simply has been pushed out of form. Each time you slice through a food, tiny bits of the edge are urged to one side or another. They are microscopic bends to your edge, but they make your knife feel dull.
A honing steel (also known as a sharpening steel, to everyone’s confusion) straightens these curved edges back into line. It doesn’t shave off metal from your blade. It just moves the edge back to where it belongs.
How Honing Works for Your Blade
So when you put your knife to a honing steel, it’s not that the material is getting shaved off as if you were sharpening. Imagine a row of small teeth that have buckled. Honing has them once again standing up straight. That’s why a knife can feel sharp again after only a few swipes down the steel.
The process is very mild and fast. Professional chefs can easily sharpen their knives three times during one shift. It takes less than 30 seconds to do and keeps the blade running smoothly.
Signs Your Knife Needs Honing
Your blade probably requires honing if:
- It was sharp yesterday and now it feels dull today
- Instead of cleanly slicing through the tomato skin, it just smooshes it
- You will use a little more pressure than you might be used to in order to cut
- You’ve used it beyond 15-20 minutes of cutting
Honing should be a regular activity, not something you do every once in a while.
A Primer on Sharpening: What Is It and Do You Need to Do It?
Sharpening is the real deal. This process is, in fact, taking metal off your blade to form a new edge. It’s like sanding down wood to make it smooth again. You’re grinding away worn metal and exposing fresh, sharp material underneath.
When it comes to sharpening as opposed to honing, you are altering the structure of your blade. It forms a new edge by taking off small amounts of steel. And this is why you don’t need to sharpen very often—because you’re bound to wear your knife out, eventually.
The Sharpening Process Explained
Sharpening, on the other hand, uses an abrasive surface (whether it’s a whetstone, an electric sharpener or a grinding wheel) to shave metal off of the knife. The process involves:
- Taking the nicked or worn metal away from the edge
- Putting a new bevel at the proper angle
- Polishing that edge, so it’s like a razor
- At times ending with a burnish
Different styles of sharpening tool work in different ways, but they’re all effectively abrading away material. You’ll have the most control with a whetstone. Electric sharpeners are faster, but they take off more metal. Professional services have special equipment for the most accurate results.
When Your Knife Really Needs Sharpening
You’ll know it’s time for a sharpening, not just a honing, when:
- Honing no longer makes the blade feel sharp
- The knife will not cut paper efficiently
- You can see chipping or nicks in the edge
- Your knives haven’t been sharpened in 6-12 months (for home cooks)
- For professional cooks, it can be monthly or every other month
The Key Differences: Sharpening vs Honing Laid Out Next to Each Other
Here’s a quick breakdown of the major differences to help you remember:
| Aspect | Honing | Sharpening |
|---|---|---|
| What it does | Straightens the blade’s edge | Removes metal to form a new edge |
| Removes Metal | No | Yes |
| How often | Before or after each use | Every 6-12 months (home use) |
| Time required | 30 seconds | 10-30 minutes (manual methods) |
| Tools | Honing steel, ceramic rod | Whetstones, electric sharpeners, professionals |
| Skill level | Easy to learn | Practice and technique |
| Purpose | Regular maintenance | Restoration and repair |
This table demonstrates why sharpening vs honing is not an either/or decision. You want both if you want to take care of your knives.
What You’ll Need for Each Method
Honing Tools
Honing Steel: The classic choice. It’s a long rod (typically 10-12 inches) that is crafted from steel, ceramic or diamond-coated material. A steel rod is fine for most home cooks. Ceramic rods are gentler. Diamond rods can also serve as light sharpeners.
Ceramic Rods: Less aggressive and smoother than steel. They’re great for knives made of harder steel, or when you want to take an especially gentle approach.
Sharpening Tools
Whetstones: These flat stones vary in grit level (degree of coarseness). Lower numbers (400-1000) remove more metal for damaged blades. Higher numbers (3000-8000) smooth and add polish to your edge. You want at least two grits for most people.
Electric Sharpeners: Fast and convenient. You pull the knife through guides toward rotating abrasive wheels. They do a great job but remove more metal than they should. Great in high-traffic kitchens when speed is of the essence.
Manual Pull-Through Sharpeners: Less expensive than electric versions. You draw the knife through a V-shaped slot. They’re fine for simple upkeep, although they don’t do the same precision job that a professional one does.
Professional Services: Local knife shops, kitchen stores and farmers markets often provide professional knife sharpening services. You can bring them your knives for a fee, which goes between $5 and $10 per knife, and they will do beautiful work on them.
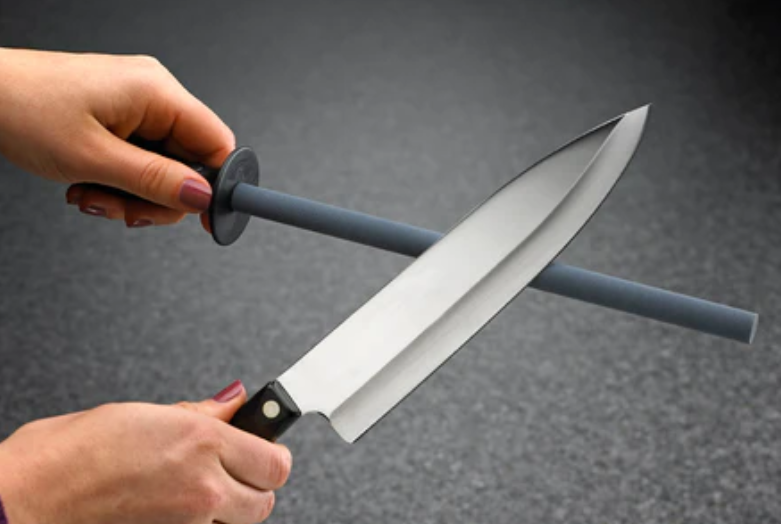
How to Hone Your Knife Well
Honing is impressive the way chefs do it quickly, but slow and steady wins this race. Here’s the right way:
Step-by-Step Honing Guide
- Set the steel upright with its tip against a cutting board or towel. This is a lot safer than just holding it in the air.
- Hold your knife at an angle of 15-20 degrees to the steel. Don’t worry about finding the perfect angle here — imagine that the angle would be something akin to a matchbook cover.
- Begin at the heel (the side of blade nearest to the handle) and apply light pressure.
- Pull the blade down and across the steel in a sweeping motion. The entire edge should make full contact with the steel from heel to tip.
- Alternate sides. One stroke on the right, one stroke on the left. Maintain the same angle all the way down.
- Repeat 5-10 times per side. That may be good enough for a quick tune-up.
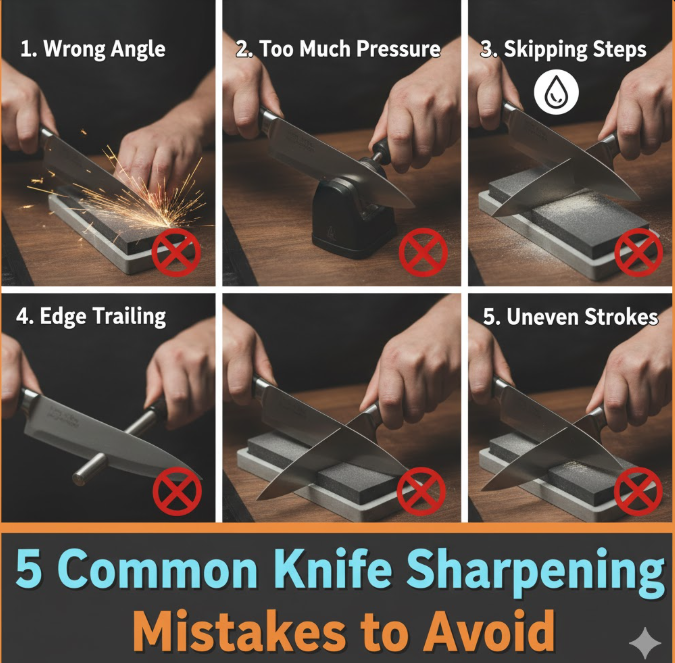
Common Mistakes to Avoid
Don’t use too much pressure. Light pressure is better than pushing down hard. You don’t want to gouge the steel, but just realign the edge you have.
Don’t hone too fast. All that wild gesticulation comes through years of practice. Slowing down means you keep the right angle throughout the stroke.
Don’t skip regular honing. Regular honing prevents the edge from becoming too misaligned so that both performance and ease of use are maintained.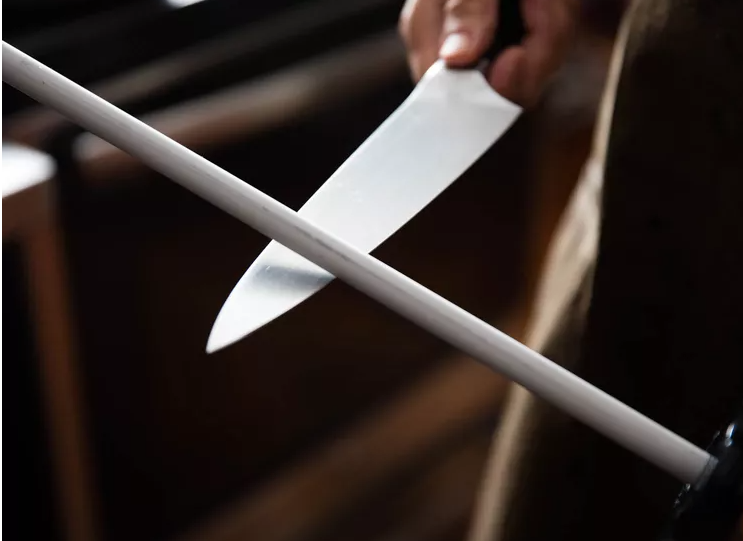
How to Sharpen Your Knife Like a Pro
Sharpening is a much more laborious and skill involved process than honing. Once you master it, however, you’ll save money and your knives can perform better than most people think is possible.
Sharpening with a Whetstone
The best way to do it, the only way to actually get great results:
- If it’s a water stone, soak your stone for 10-15 minutes. Some stones require oil instead — read the instructions.
- Set the stone directly on a damp towel to keep it from slipping.
- Find your angle. For most kitchen knives, you want 15-20 degrees. A simple mind trick: picture three coins stacked under the blade’s spine.
- Begin with the side of coarse grit (lower grit number). First, lay the blade flat and then lift up from its spine to achieve your desired angle.
- Push forward at a steady angle across the entire edge. Use medium pressure. As you do so listen for a soft scraping noise.
- Take 10-20 strokes on one side, flip the knife and do the same on the other.
- Switch to fine grit and repeat with lighter pressure.
- Test sharpness on paper or a tomato by cutting it carefully.
Using an Electric Sharpener
Much simpler but less precise:
- Review the manual for your own model. Each one is different.
- Draw the knife through the coarse slot 3 to 5 times at a consistent pace.
- Proceed to the fine slot for 3-5 additional passes.
- Rinse blade to remove metal fragments.
Electric sharpeners are great for people who don’t want to learn how to use a whetstone. Keep in mind though; they take away more metal, so you can’t use them at every sharpening.
How Often Should You Hone vs Sharpen?
That depends on how much you use your knives, but here’s a good guideline:
For Home Cooks
Honing: Before you cook, or at least once weekly. It’s 30 seconds, and it really makes a big difference. Professional chefs hone two or three times in one meal prep.
Sharpening: Once or twice a year, if you’re honing regularly. If you never hone the knife, you may have to sharpen every 3-4 months as the edge gets far too damaged for honing alone.
For Professional Kitchens
Honing: Multiple times per shift. Busy line cooks could hone every 30 to 60 minutes, depending on dinner service volume.
Sharpening: Weekly to monthly depending on the volume of kitchen use. Some restaurants employ a sharpening service that visits each week to keep all the knives in shape.
Signs You’re Doing It Right
If you hone frequently, your knives ought to feel pretty much as sharp for months. When honing is no longer as effective, that’s your cue to sharpen. Think of honing and sharpening as a partnership for a drastic increase in the time between sharpening.
Mistakes That Damage Your Knives
Even with the best of intentions, people do things that ruin their blades. Here’s what to avoid:
Using the Wrong Tool
Do not try to sharpen with a honing steel. It won’t work. No whetstone-honing either: you might as well use a sledgehammer to nail in a picture.
Inconsistent Angles
All of these tools require you to keep the blade at a consistent angle while controlling it so you don’t accidentally change angles mid-stroke and end up with an uneven edge. It may look sharp, but it won’t cut well. Choose an angle and maintain it consistently throughout.
Too Much Sharpening
Many seem to believe that more sharpening is better. Wrong. Each sharpening removes metal. Over-sharpening wears away your knife faster. Hone frequently, sharpen rarely.
Ignoring Maintenance
The biggest mistake is to do nothing. A neglected knife is more difficult to repair. A little regular honing takes almost no time and will prevent most problems.
Dishwasher Damage
No, this isn’t strictly about sharpening vs honing, but I’ve seen what dishwashers do to knife edges. It’s a double whammy when harsh detergents and high heat are combined with banging into other items. Knives should be hand washed and dried as soon as possible.
Special Cases: Some Knives Require Special Care
Not all knives are made the same. The method varies depending on what you’re dealing with.
Japanese vs Western Knives
Japanese knives have thinner, harder steel and much steeper angles (10-15 degrees). Western knives are thicker and sharpened to wider angles (20 degrees). Japanese knives should be honed more gently with ceramic rods. Western knives will work with typical steel honing rods.
Serrated Knives
You almost never have to sharpen serrated knives. If you do, you have to use special tools or the service of a pro. Just keep them clean and don’t attempt to hone them — it does not work on the teeth.
Ceramic Knives
Regular steels will not sharpen these. They require special diamond-coated tools or sharpening by a professional. The good news is that they keep an edge far, far longer than steel knives.
The Bottom Line: DIY vs Hiring a Pro
Let’s talk money. Learn the difference between sharpening vs honing and you will save hundreds of dollars in the long run.
Initial Investment
- Honing steel: £15-50, and a good one can last for years
- Simple whetstone: £30-60 for a two sided stone
- Quality electric sharpener: £50-150
- Cost of professional service: £5-10 per knife, per sharpening
Long-Term Value
If you have five knives and pay to get your knives professionally sharpened twice a year, that’s £50-100 a year. You will require a decent honing steel and stone to sharpen the blade which together run about $80, and both last for years. And you can sharpen them whenever they need to be instead of waiting for appointments.
DIY it, and you’ll pay off the equipment in a year or less.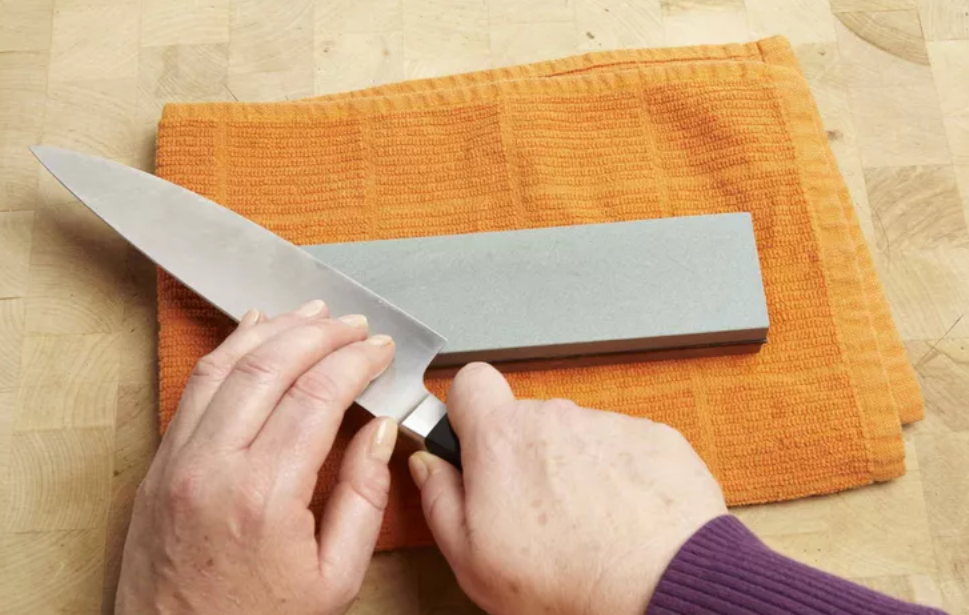
Frequently Asked Questions
Can’t I just sharpen my knife, instead of honing it?
You could, but you would ruin your knife much more quickly. Sharpening removes metal every time. Honing only straightens out the edge that’s already there, it doesn’t remove any material. Hone often, sharpen rarely.
How can I tell whether my knife requires honing or sharpening?
Try honing first. If, after a few strokes on the steel, the knife feels sharp again, then all it needed was honing. If honing doesn’t make much difference anymore, you need to sharpen it.
What is the difference between a honing steel and sharpening steel?
No, they are actually the same tool with two confusing names. Embarrassingly, a sharpening steel doesn’t actually sharpen. The knife industry really ought to address this nomenclature issue.
Can you over-hone a knife?
Not really. Honing does not remove metal, so you cannot do it too much and ruin your blade. It might be a waste of time, but it can’t hurt the knife.
How long does a good sharpening last?
With regular honing, a good sharpening should last 6-12 months for home cooks. Heavy use makes professional kitchens sharpen more often.
At what angle should I sharpen?
Kitchen knives mostly perform at 15-20 degrees per side. The 20-degree angle may be the way to go. It’s a forgiving edge and holds up well.
Conclusion: Maintaining Your Knives in Perfect Shape
The sharpening vs honing distinction may seem subtle, but it’s the key to keeping your knives professional-quality at home. To refresh your memory: honing is your everyday maintenance that takes 30 seconds before you cook. Sharpening is the once-or-twice-a-year upkeep that restores a damaged edge.
Start building these habits today. Hone your knives before each use. Learn to sharpen on a whetstone, or find a trusted professional service. Your knives will cut more smoothly, last longer, and cooking will become more fun.
The best part? Once you learn these methods, it will quickly become apparent that most everyone around you is using dull knives and doesn’t even know it. A sharp knife isn’t just safer and more efficient – it makes cooking fun rather than a chore. For more expert guidance and professional sharpening services, visit resources like the Culinary Institute of America’s knife skills guide to deepen your knowledge. Treat your knives well, and they’ll treat you well in return for decades.