Tips to Sharpen Knives
Every cook has experienced the maddening limitations of a dull knife. It slips, it tears your food instead of cutting it cleanly and it makes cooking a whole lot less fun. But what if you need to hone a blade without whetstone? Maybe you don’t have one, or you’re traveling and need a simple fix. The good news is that you have some highly effective choices in your own residence.
A blunt knife is more dangerous than a sharp one. The less force you use and the more controlled you are, the cleaner your blade will cut through whatever it is that you’re slicing. This cuts down the probability of kitchen mishaps. Professional chefs know this and they always have their knives razor sharp.
In this guide, you will learn about five different simple and easy ways to bring your knife edge—whether damaged or dull—back to life with items found easily in the home. And these shortcuts actually work very well, while also saving time and money. Whether you’re about to barbecue or tackling a job outdoors, we’ve got some simple tricks for keeping your blades sharp in the absence of dedicated equipment.
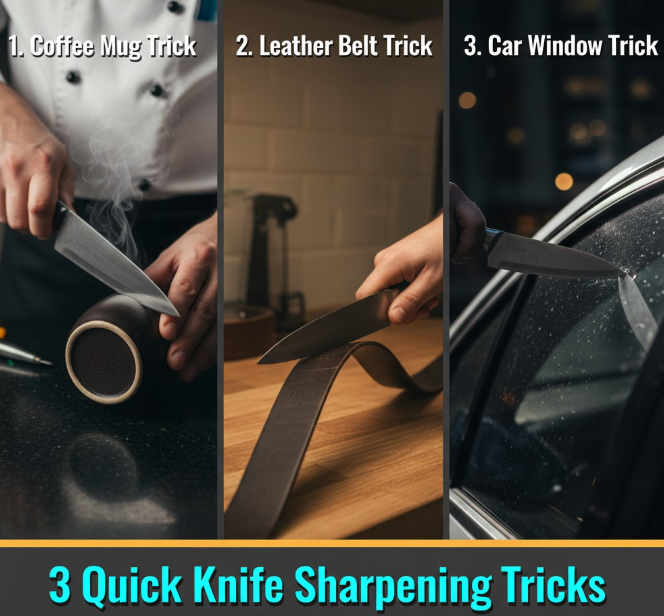
Method 1: Coffee Mug Bottom Trick
Why Your Coffee Mug Is a Great Sharpening Tool
The bottom of most ceramic coffee mugs is unglazed and functions like a whetstone. This coarse ceramic material is abrasive enough to realign and sharpen the edge of your knife. When you’re in a bind, it’s one of the best ways to sharpen knives without whetstone.
Find a mug with an obvious rough ring around the bottom. Porcelain or stoneware mugs are best, as they have an ideal texture. Stay away from mugs that are entirely smooth on the bottom, as these won’t provide enough friction.
Step-by-Step Coffee Mug Sharpening Process
First, turn your cup upside down on the flat ground. Damp towel underneath to prevent slippage. Grip the mug with your non-dominant hand.
Place the knife flat against the rough ring at 20 degrees. This angle is required for accurate sharpening. Here’s something to imagine if you’re feeling iffy about your angle: imagine you were going to slice a fraction off the top of the edge of the mug.
Sweep the blade across the ring from point to heel in a single smooth motion. Apply gentle but consistent pressure. Beginning from the bottom of the blade near the handle, drag up towards the tip. Do this drill 10-15 times on one side.
Turn the knife over and do the same to the other side. Try to move slow and controlled. You should feel and hear a little bit of a grind as the ceramic takes away little bits of metal.
After sharpening both sides, test your knife on a piece of paper. A sharp knife should cut through cleanly, without any tearing. If it still feels pretty dull, go back and do a few more passes on each side.
Method 2: Using Another Knife for Honing
The Science Behind Knife-on-Knife Sharpening
When you sharpen knives not on whetstone with another knife, you are just using the edge of one blade to properly align it. This will technically sharpen the edge, but not in a sense which is actually recommended for regular use. The back of a knife’s spine is usually harder than the edge, so it can be used for maintenance purposes.
It’s the perfect method for taking in the field, camping or simply in case of an emergency. You don’t even need a special tool, just two knives from your kitchen drawer.
Proper Technique for Knife-on-Knife Method
Pick two knives of approximately the same size. One is your sharpening tool, and the other is the knife you are to sharpen. The knife you are using as sharpener needs to have a sturdy, straight back.
If you’re right-handed, keep the knife you’d like to sharpen in your right hand. Take the second knife and flip it over, so the spine of the blade (the back edge) is facing upward. Grasp this knife in your other hand, or place it down on a cutting board.
Turn the blade you’re sharpening so that it’s resting against the spine of your other knife, at a 20 degree angle or so. Use the blade of your dull knife, and pull it across the spine with smooth, evenly distributed pressure. Begin at the bottom of your blade and draw up toward the top.
Do 8-10 strokes on one side, then turn your knife over and do the same thing to the other side. Switch sides so you have an even edge. This method is perfect for a light touch as opposed to heavy use on very dull knives.
The secret is holding an even angle throughout each stroke. An uneven edge is not going to cut well.
Method 3: The Leather Belt Sharpening Method
What Does Leather Honing Do to Your Edge?
When you use leather belts for stropping, you are guaranteed an ideal polishing surface. It’s a technique that barbers and shaving aficionados have been utilizing for thousands of years. The slightly abrasive texture of the leather smooths and sharpens the edge, without repeatedly removing metal.
Honing knives with a leather belt is sharpening without whetstone. It’s a good move after you’ve tried one of the rougher methods above.
Preparing Your Leather Belt to Strop
Locate an old thick stiff belt made of leather. (Avoid synthetic belts, which don’t have the right texture.) Tighten the belt and secure the buckle on both sides. You can loop one end around a door handle and grip the other, or fix it between two immobile objects.
Ensure the smooth leather side faces outward, not the rough suede. The belt has to be as tight as a guitar string to give the resistance needed.
Stropping Technique for Maximum Sharpness
Lay your knife flat to the leather belt—around 10-15 degrees is what you’re aiming for. Instead of the knife moving forward, as with other sharpening systems, it is pulled backward along the leather from tip to heel. The cutting edge should trail behind, or else you will cut the leather.
This backward motion is critical. Never force the blade forward or you will cut into the leather and ruin both your belt and your edge.
Do 15-20 clean strokes on one side of the blade and then flip and do the same to the other. Press gently—you are not grinding; you are polishing. The stroke should be smooth and the leather should never separate.
Your knife feels distinctly sharper and smoother after stropping. The edge is sharpened and honed and its resulting finish will be fine and smooth, ideal for giving clean and easy cuts.
Method 4: Sharpening with Sandpaper
Why Is Sandpaper a Good Sharpening Surface?
Sandpaper is a dependable alternative to sharpening knives without whetstone, because it has different grits just the way whetstones do. The rough grit scratchy bits on the sandpaper take metal away from your blade to reveal a new, sharp edge. It’s cheap, it’s available and it works.
Sandpaper is available at most hardware stores, or online. For sharpening knives, you’ll want two basic grits: a coarse material for shaping an edge, and a finer one to finish.
Choosing the Right Sandpaper Grits
Use 400-600 grit sandpaper on extremely dull or damaged blades. This heavy grit takes metal off fast and forms the edge. For a moderately dull knife, start with 800-1000 grit.
Always end with fine grit such as 1500-2000+ grit sandpaper. This results in a smooth, polished edge that simply slices through whatever you desire. Think of it like you would with a car: coarse grit does the heavy lifting and fine grit is used to add that final touch.
The Sandpaper Sharpening Process
Lay your sandpaper on a level, sturdy surface. You can affix it with glue or tape to a piece of wood, or any stiff material to prevent it from sliding around. Others glue the sandpaper to a block of wood for easier use.
Angle your knife 15 to 20 degrees relative to the sandpaper. Sweep the blade across the paper as if you’re trying to slice a very thin layer from its surface. Go from the heel to the tip in a sweeping motion.
Do 10 to 15 strokes on one side, then flip your knife over and do the other. When you’re done sharpening both sides with your coarse grit, do the same on both sides with your fine grit sandpaper.
The progression of grits is important. Without it, the edge is rougher and not as efficient. When you’re done sharpening with the finest grit, clean off your knife blade to get rid of metal particles.
Method 5: The Smooth Stone or Concrete Method
Selecting the Best Stone for Knife Sharpening
Smooth river rocks or flat concrete can also be used to sharpen the blade without whetstone when you are outside or in an emergency. The secret lies in finding the right rock, something with texture—not too rough or too smooth.
Seek a flat stone with a close, fine grain. It doesn’t have to be anything fancy: limestone, slate and some sandstones all get the job done. Avoid the stones with crystals that are too large or have surfaces that are too rough as these will create nicks in your blade. The surface of the stone should feel sandy when you run your finger over it.
You can also use concrete blocks, or smooth concrete surfaces. The aggregate in concrete gives the grinding action required to sharpen a knife.
Outdoor Sharpening Technique with Stones
Wet down the surface of your stone or concrete. This lubrication aids the sharpening process while reducing heat build up on the blade’s edge from friction. Keep the surface wet during sharpening.
Place your knife against the stone at a 20-degree angle. Stroke in either direction, circular or straight, whatever feels most natural. Keep your angle consistent.
Sharpen one side of the blade with about 20 strokes and then equally work the other. Test your progress by running a finger across the edge (not along it). You should feel a little bit of burr developing—this means that you are forming a new edge.
When you have developed a burr on both sides, move to lighter strokes to refine the edge. Switch sides applying less and less pressure until the edge is sharp and even.
This method does take time and will not produce a knife as sharp as professional equipment. But it’s very handy in camping or survival situations when you need to sharpen without a whetstone.
Comparison Table: Which Method Is Best?
| Method | Effectiveness | Skill Level | Time | Best For |
|---|---|---|---|---|
| Coffee Mug | High | Beginner | 3-5 min | Kitchen knives, quick touch-ups |
| Another Knife | Medium | Intermediate | 2-4 min | Emergency sharpening, honing |
| Leather Belt | High | Intermediate | 5-7 min | Finishing, polishing edges |
| Sandpaper | Very High | Beginner | 8-12 min | Very dull knives, controlled sharpening |
| Stone/Concrete | Medium | Advanced | 10-15 min | Outdoor/survival situations |
Safety Tips: Sharpening Without Professional Tools
Protecting Your Hands and Fingers
Sharpening knives requires handling blades at angles that can be risky. Always sharpen away from you, and keep fingers behind the edge of the blade at all times.
If you are new to sharpening, put on a cut-resistant glove on your non-dominant hand. These are inexpensive gloves, and will offer good protection while you’re learning.
Work in bright light so you can see what you’re doing. Sharpening in a hurry or in poor lighting causes accidents.
Maintaining Consistent Angles
Irregular angles create edges that tarnish easily and are difficult to sharpen. Discover a way that allows you to keep this angle consistent during the entire stroke. Some practitioners use a marker to color the edge first, and see if sharpening results in an even removal.
Practice your angle on an old knife before you move to work on your best kitchen knives. You can practice this to develop muscle memory.
Testing Your Sharpened Knife Safely
Never test sharpness by running your finger along the edge. Instead, try slicing a piece of paper to test the sharpness: hold a piece of paper by one corner and see if you’re able to slice through it with your knife. A sharp blade creates a clean cut through the paper. A sharp edge feels amazing when you can actually test it properly.
You can also attempt the tomato test. A well-sharpened knife takes very little pressure to cut through the skin of a tomato.
Maintaining Your Knife’s Sharpness
Daily Care Prevents Dullness
Even when you know how to sharpen a knife without whetstone, prevention is best. You should store your knives in a knife block, on a magnetic strip, or in blade guards. Throwing knives into a loose drawer quickly ruins edges.
Use appropriate cutting boards. Plastic or wood boards are knife-friendly; glass, marble and ceramic boards will dull a blade quickly.
When to Sharpen vs. When to Hone
Know the difference between honing and sharpening. Honing straightens out your edge without taking any metal off, while sharpening removes steel and creates a new edge. Regularly hone your knives (once a week for knives used frequently) and sharpen them only when honing doesn’t work to restore their cutting ability.
A honing steel or the back of another knife is all it takes for routine maintenance. Reserve your sharpening skills for when the blade truly needs it—which if you’re a home cook is usually only every few months. For professional knife sharpening services, you can also consult experts who use specialized equipment to restore your blades to optimal condition.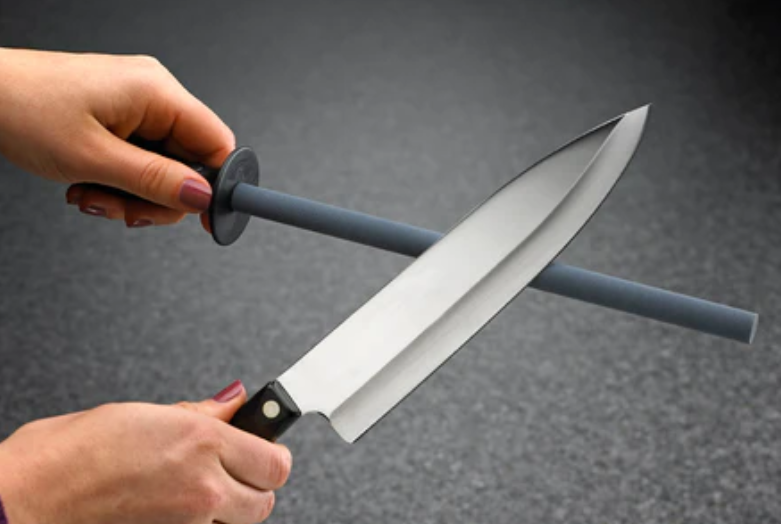
Frequently Asked Questions
Q: How frequently should I sharpen my kitchen knives?
A: Home chefs should sharpen every 2-3 months with regular use. Professional chefs may sharpen weekly. It depends on how much you use your knives and on what. Keep your knives honed between sharpenings.
Q: Will these methods ruin my fancy knives?
A: If done properly, these methods are safe to use on the majority of kitchen knives. But practice on your cheap knives first. Very expensive or specialty knives may be better served with professional sharpening. Sandpaper allows you more control and is softest on higher quality blades.
Q: Does it matter what angle I use to sharpen?
A: The majority of kitchen knives perform best at 15-20 degrees per side. Western-style knives usually use 20 degrees, and Japanese knives 15. If you are unsure, 20 degrees is a good general angle and will work well for most knives.
Q: My knife looks sharp but doesn’t want to cut?
A: Your knife could have a wire edge or burr that’s making it feel sharp but cut poorly. After all sharpening is done, perform several light passes on both sides to eliminate this burr. Also, make sure you have sharpened both sides equally.
Q: What is better for sharpening knives, wet or dry?
A: It depends on the method. The coffee mug and another knife methods both work dry. Sandpaper works both ways but lasts longer when it’s dry. Stone and concrete are generally better to work on wet. Water or light oil provides lubrication and helps prevent metal particles from clogging the abrasive.
Q: Can I sharpen a serrated knife using these methods?
A: Serrated knives need special techniques since they have teeth. These methods are better for knives with straight edges. For serrated blades, you’d require a special sharpener or professional help.
Final Verdict: Sharpening Your Knives at Home
Learning how to sharpen knives without a whetstone helps you keep your kitchen tools sharp. All of the methods laid out here are practical solutions with things you probably already have in your house. The coffee mug trick is perfect for a quick touch-up before meal prep. Sandpaper is a wallet-friendly option that produces professional effects if used with care.
Keep in mind—sharpening is an art which gets better with time. Your initial tries may not be perfect, but you’ll get the feel for the angle and pressure. Begin by using less expensive knives while you learn, and then gradually move up to your nicer blades once you feel comfortable.
Cooking is easier, faster and more fun with a sharp knife. They give you more control, minimize waste of food and provide for a more precise slice. Whether you are chopping vegetables for dinner at home, or getting ready to make a restaurant quality dish at your friend’s house, any chef will agree that it’s all about the good knife.
Keep ’em sharp, practice these moves every so often and you won’t curse a dull blade again. Your efforts in the kitchen will be streamlined and you will enjoy meal prep more than ever. The joy of cutting through a tomato or onion with a razor-sharp knife is something every home cook should get to experience.
For more information on proper knife maintenance and sharpening techniques, visit the Serious Eats guide to knife sharpening.