A good knife makes cooking safer and more fun. If you’re tired of dull and frustrating knives, keep reading to learn how to use a whetstone. This old-school sharpening technique puts your blade’s edge entirely in your control and it’s not as tough as it seems.
I would imagine that many folks are intimidated by whetstones because they assume they’re meant for professional chefs and knife aficionados. The reality is that it is something literally anyone can learn, with a little coaching and even less practice. This guide will take you through the process, from selecting the best stone to create a razor-sharp edge.
Unlike electric sharpeners that remove too much metal, or pull-through sharpeners that can damage your blade, whetstones provide you precision and care. They are the gentlest way to keep your knives and once you learn how, you will never want anything else.
What Makes Whetstones Different for Sharpening
Whetstones have been honing blades for thousands of years in many cultures. The term “whetstone” comes from the word “whet” to sharpen, not water (though many use water when using these stones to sharpen).
These stones cut metal pounds or thousandths of an inch at a time to form a new edge. Think of it as the difference between sanding wood with rough or fine sandpaper — the stone’s surface has microscopic abrasives that will shape your knife edge a little more, each time you use it.
One of the things that makes learning to use a whetstone so great is how much control it provides you. You control the angle, how much pressure to apply and how many passes to make. This control allows the blade to be sharpened to create any desired angle, even as much as a thick chef’s knife or fine paring knife.
Whetstones come in a variety of materials such as natural stones, ceramics, and diamond-embedded options. There are drawbacks and benefits of each type, but they all use controlled abrasion to even your skin’s texture.
Types of Whetstones You’ll Encounter
Grit Numbers Explained Simply
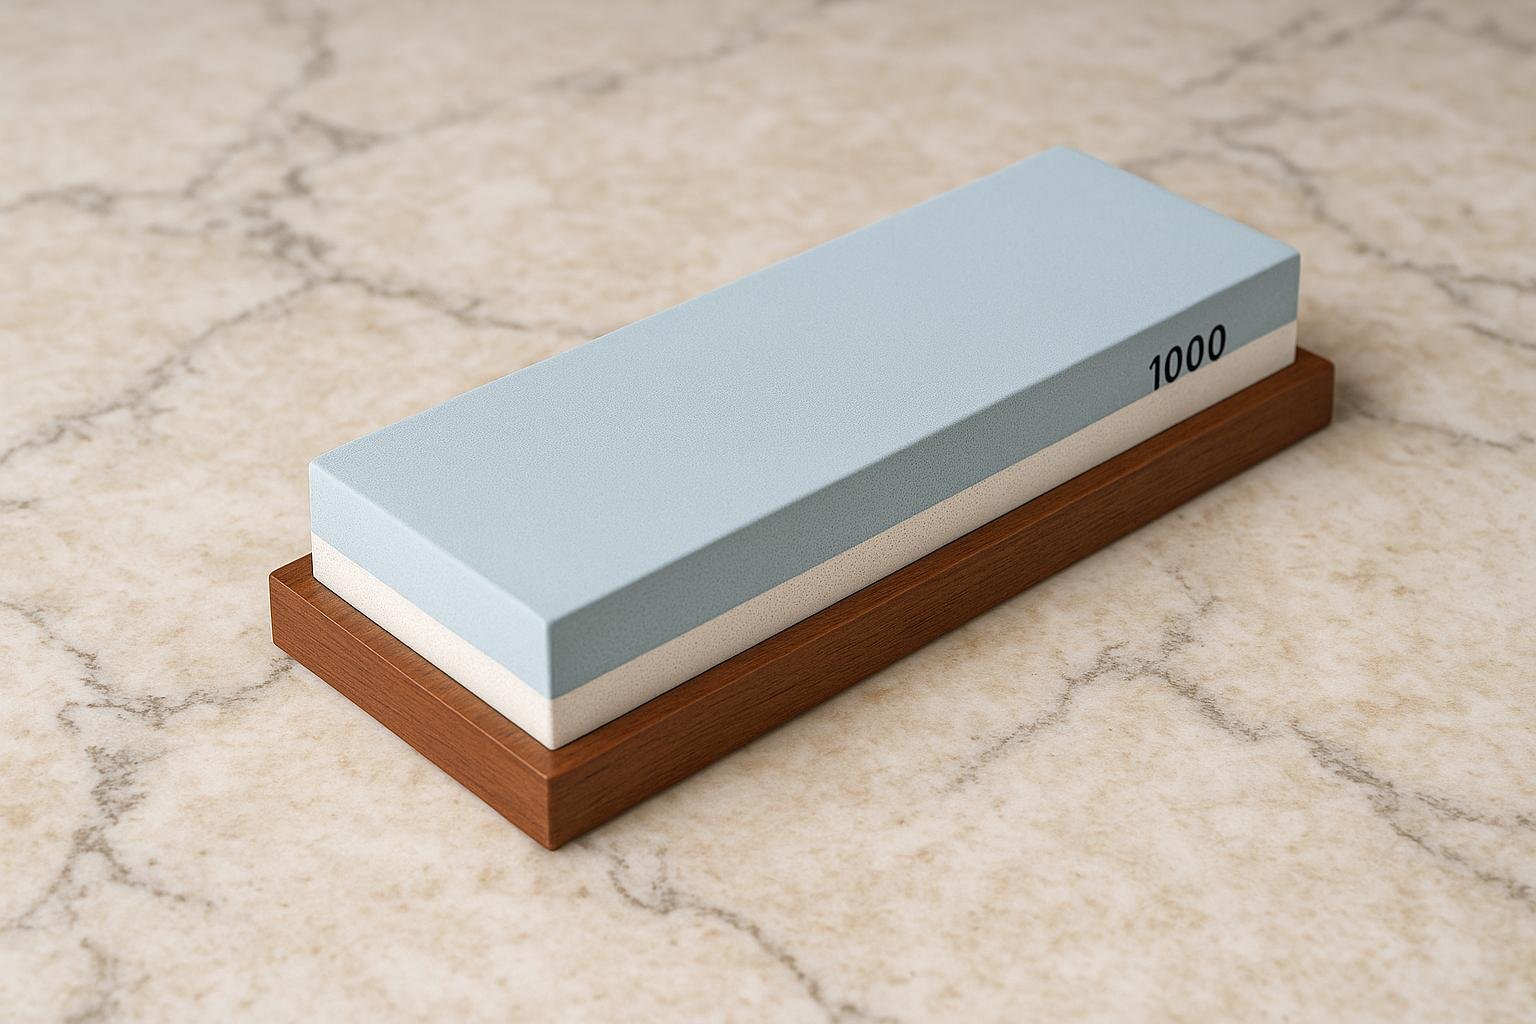
Whetstones feature numbers that indicate how rough or fine they are. The lower the number, the coarser the stone, and the higher number indicates a finer stone.
- 200-400 grit: Super coarse stones are for damaged or very dull knives.
- 800-1000 grit – medium: Medium stones for routine edge maintenance and sharpening
- 3000-8000 grit: Polishing & Honing stones, perfect for sharpening an already sharpened blade and maintaining the edge.
- 8000 & above: Hyper-Fine stones for Polishing
The majority of beginners will want to start with a combination stone that has 1000 grit on one side and 3000-6000 grit on the other. This provides you with all the basics to get things nice and sharp.
Material Choices
Water Stones: The most common style is the water stone. They have to soak in water before using, but work fast to sharpen your blade. Japanese Water Stones are particularly popular due to their efficiency.
Oil Stones: Oil stones are lubricated with honing oil instead of water. They also cut more slowly but have a longer shelf life and require less maintenance between sessions.
Diamond Stones: These contain industrial diamonds bonded to a flat plate. They are the simplest to maintain and can be used dry or with water.
Essential Supplies Before You Start
Before you learn how to use a whetstone, there are several supplies you will need:
- Whetstone (recommended combination stone for beginners)
- Water or honing oil
- A towel or stone holder to stop slippage
- A dull knife to practice on
- Dry towel for wiping the blade
Optional, but useful items would be a sink bridge or stone holder, an angle guide for beginners and a piece of leather for when you finish sharpening and want to strop.
Preparing Your Whetstone Properly
Soaking Water Stones
If you are using a water stone then soak it properly. Put the stone in a bowl and fill them with enough room-temperature water to cover it.
Look for any bubbles that may rise up from the stone. Your stone is ready when the bubbles stop (in 10-15 minutes). Some coarser stones take only 5 minutes, the finer ones perhaps 20 minutes.
Never soak a stone that is not meant to be soaked. Oil stones and diamond stones don’t require soaking, and can be ruined by too much exposure to water.
Setting Up Your Workspace
You just need a place where you can work at counter height to avoid hunching over. You will need good lighting so you can see what you’re doing.
Spread a damp towel on your surface to keep the stone from shifting. Others use a stone holder or sink bridge to prevent slipping. The stone should not wobble when fully seated.
Situate so that you’re able to slide the knife comfortably over the full length of the stone. For fluid, uninterrupted motions, you want that freedom of movement.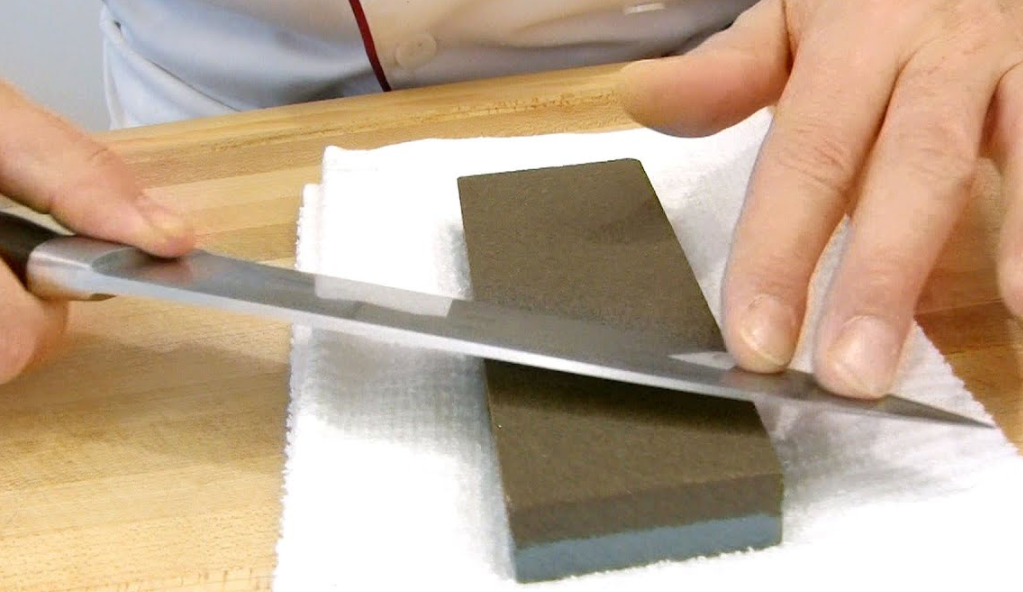
Finding the Perfect Sharpening Angle
The included angle (the one between the knife and the stone) is what tells you how sharp or durable your edge will be. Most kitchen knives will best sharpen at 15-20 degrees per side.
Here’s an easy trick to locate the correct angle: Start with your knife perpendicular to the stone (90 degrees), then tilt it halfway down (45 degrees), and halfway again (about 22 degrees). Then drop it down a little to your desired angle.
Another way is the use of coins or folded paper as angle guides. Two quarters stacked under the spine of your knife gives you about 15-degree angle with most chef’s knives.
It’s more about consistency than the precise angle. Whatever angle you decide upon, stick with it for the duration of sharpening, on each side of the blade.
The Complete Sharpening Process
Starting with the Coarse Side
Put your stone coarse side up (the lower number). You’ll want to wet the surface if you’re working with a water stone — it should be kept wet fairly consistently while in use.
Grip the knife by its handle in your dominant hand. Put the fingers of your other hand on the flat part of the blade by the edge. This provides pressure and control.
Set the knife at your preferred angle and with the edge facing just away from you. Begin with the heel (right along the handle) part of the blade touching the stone.
Wipe the knife across the stone in an arc, from heel to tip. Keep pressure moderate and even — roughly equivalent to how firmly you would spread butter on toast.
As you push, slide the knife sideways so that at the end of the stroke, the tip of the blade is touching an edge of the stone. The whole edge must hit on each stroke.
Counting Your Strokes
Use 10-15 strokes on one side before turning the knife over. It is consistency that you need when figuring out how to use a whetstone.
After applying strokes to the first side of the knife, flip it and then even out on the other side with an equal number of strokes. The edge is now toward you, and you’re going to pull the knife instead of push it.
You should maintain the same angle and pressure on both sides. Uneven sharpening leaves a jagged edge that won’t cut well.
Moving to the Fine Side
Once both sides are as well-matched as possible using the coarse side, turn your stone to its fine side (the higher grit). Wash away any metal particles and wet the surface again.
Do it again using a little less pressure. The fine side hones the edge formed by the coarse side. Do 10 strokes on one side and switch more often.
You might do 10 strokes on side A, 10 strokes on side B, then 5 and 5, then 3 and 3 — followed by single alternating strokes for the final few.
Checking Your Progress
As you sharpen, particles of metal (known as “swarf”) will combine with water to create a gray slurry on the face of the stone. This slurry really aids in sharpening, so avoid wiping it away all the time.
Run your fingernail or thumb pad along the edge and feel for a burr. A burr is a fine, wiry edge of metal that appears on the opposite side of the one you are sharpening. Once you feel this burr across the whole edge that means you have ground enough on that side.
The burr should be a small consistent burr from heel to tip. If you’re feeling it only in some places, keep sharpening the weak areas.
Test sharpness by carefully cutting through paper. A well-sharpened knife should be able to cut through paper without pushing or tearing it.
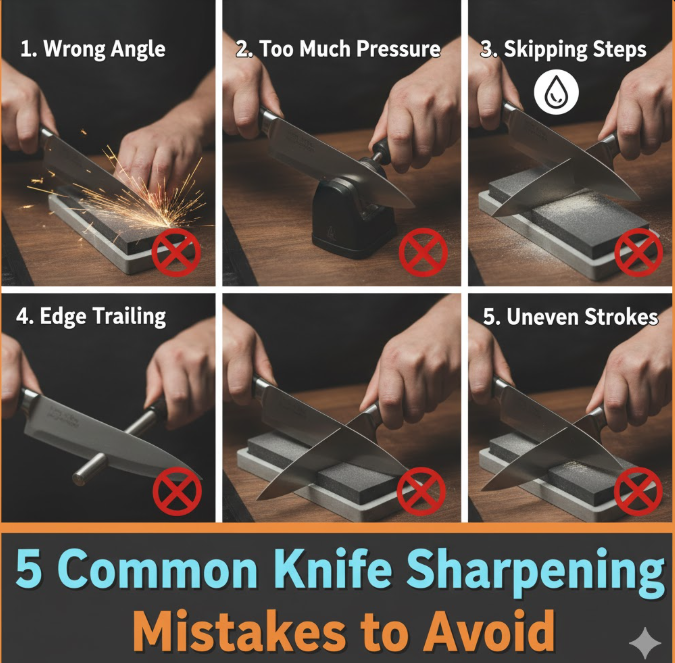
Common Mistakes Beginners Make
Varying angles: This is the No. 1 problem. Work on keeping your angle consistent by continually verifying with your reference.
Too much pressure: Pushing too hard does not make a blade sharper faster. It will wear out your stone and can cause damage to the edge of the knife. Gentle, consistent pressure works best.
Not sharpening the whole edge: Ensure that you sweep or roll your knife over its entire edge, from heel to tip.
Racing through it: Sharpening requires patience, especially when you’re still learning how to use a whetstone. Better results are achieved with patience rather than speed.
Failing to keep it wet: Water stones require constant saturation. Add water whenever the top appears dry.
Using the wrong grit: Starting with too fine of a grit won’t be effective on a dull knife. Start coarse (1,000 grit or lower) and work up to finer grits. As a rule, start with an appropriate coarseness for the current state of your blade.
Taking Care of Your Whetstone
Wash your stone under running water after use. Remove all slurry and metal particles with a soft brush or your hands.
Air dry the stone fully before putting it away. Never store a wet stone in an enclosed container — this can create mold or odors.
As your stone becomes further worn, it will develop uneven wear patterns or grooves. Flatten it with a flattening stone or lapping plate. Some people also use sandpaper on a flat surface such as glass.
Test for flatness by putting a straightedge on the stone. There should be no light coming from underneath if the stone is perfectly flat.
Keep your stone dry and at average room temperature. Some stones can crack if they freeze wet.
Building Your Sharpening Skills
Begin practicing on cheaper knives before you start work on your expensive chef’s knife. We all make mistakes learning, and practice knives allow you to experiment without fear.
Sharpen in strong light, so you can see the edge and test your angle. Natural morning light or bright overhead light is best.
Take breaks if your hands get tired. Fatigued muscles lead to inconsistent angles. Five minutes of sharp focused effort is greater than twenty minutes of worn out work.
Record your progress. Use before-and-after tests slicing paper or tomatoes. Success makes you want to continue practicing.
For professional knife sharpening services and expert guidance, visit DTDF Knife Sharpening to learn more about maintaining your blades.
Sign up for online groups where people offer suggestions on how to use a whetstone. It is much easier to comprehend the motion and angle of something when it is in action by watching videos than just reading descriptions. The Japanese Knife Imports forum offers excellent video tutorials and community support for sharpeners at all skill levels.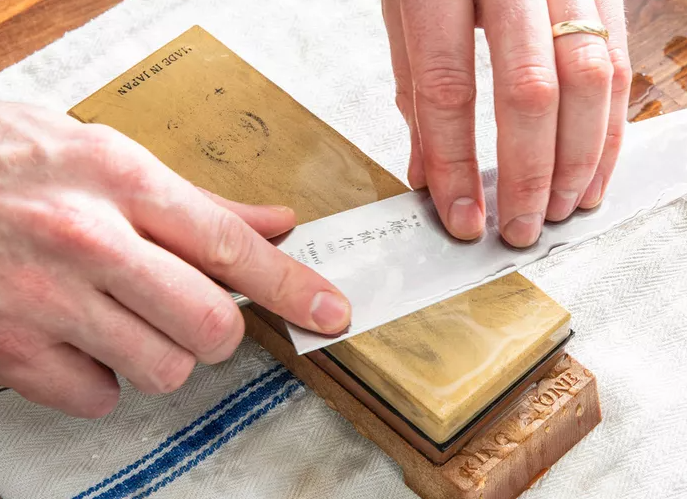
Quick Reference: Sharpening Steps Table
| Step | Grit Level | Strokes Per Side | Purpose |
|---|---|---|---|
| 1. Soak stone | N/A | N/A | Prepare stone for use |
| 2. Set angle | N/A | N/A | Establish 15-20 degrees |
| 3. Coarse sharpening | 1000 | 10-15 | Create new edge |
| 4. Deburr | 1000 | As required | Inspect that the sharpening is finished |
| 5. Fine sharpening | 3000-6000 | 10 per side | Polish and hone |
| 6. Alternating stropping | 3000-6000 | 5 then 3 then 1 | Perfect edge finish |
| 7. Test sharpness | N/A | N/A | Confirm results |
Frequently Asked Questions
How often do you need to use a whetstone on knives?
Home cooks should sharpen every 2-3 months for often-used knives. Professional chefs might sharpen weekly. When your blade will no longer cut tomato, or paper, for that matter… performance will drive you.
Can you sharpen serrated knives with a stone?
Regular whetstones are not well suited for serrated edges. These knives require a special kind of tapered sharpening rod that can nest between the serrations. The overwhelming majority of serrated knives will retain their sharpness for years, if not decades, with regular use.
How is sharpening different from honing?
Sharpening uses a whetstone to abrade metal and form a fresh edge. Honing, using a honing steel or rod, re-aligns an already existing edge. Honing helps a knife maintain its sharpness between sharpenings but can’t make a truly dull blade sharp.
Are there differences between expensive and cheap whetstones?
The better quality stones usually cut quicker, wear longer and give a more consistent finish. That said, even budget stones can be used to sharpen knives effectively – if you know how. Begin with a mid-range stone and you can always add a better one later if you need it.
How do I tell if my whetstone is worn out?
Whetstones wear slowly over time. Replace your stone when it gets too thin to use safely, has developed cracks or if the abrasive surface has worn down until it stops sharpening effectively. Good stones will last a lifetime.
Are you able to sharpen scissors with a whetstone?
Yes, you can sharpen scissors on a whetstone, though the process is somewhat different. If you can, take the scissors apart and sharpen each blade independently according to the original bevel angle. Place the flat side of each blade flat to your stone.
Your Path to Razor-Sharp Knives
Learning how to use a whetstone changes the way you cook. The right knife can make prep work faster, safer and more fun. What you learned here will help you for the rest of your life.
Just remember everybody’s been a beginner. Some of your first efforts may look lackluster, but every time you sharpen, your muscle memory and understanding grows. After a few practice sessions, the movement will feel completely normal and you’ll be getting great results in no time.
The purchase of a decent whetstone is more than worth the investment. Professional sharpening services cost money per knife, but your stone will last for thousands of blades over the course of its life. Gone are the days of replacing knives because they have lost their sharpness.
Get one knife, and get out one stone. Get good enough to feel confident and start sharpening other blades you own. Before you know it, friends and family will start asking you to sharpen their knives as well.
Keep your stone clean and flat, try to hold that angle as closely as possible and you’ll be golden. All those hours spent practicing are totally worth it when you get to cut through a tomato using a knife that you have sharpened yourself. That first pass across the stone is the beginning of your quest for perfectly sharpened knives.