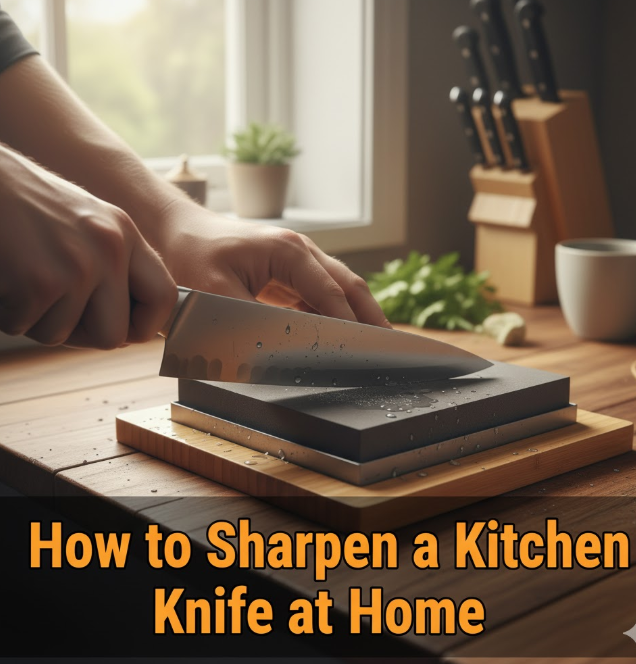
How a Sharp Knife Can Improve Cooking
Sure way to end any mix well are the bad knives. You give a tomato a good, hard squeeze and it squishes rather than slices neatly. You attempt to chop an onion, and it rips instead of slices. These exasperating moments occur because your knife has lost its edge.
A lot of home cooks are reluctant to sharpen their knives because they think that doing so is either complicated or time-consuming. The fact is, there’s a small universe of basic knife sharpening tricks you should know that will save you time, make cooking safer and help your end results turn out better in the kitchen. A dull blade forces you to use more pressure, which leads to decreased control and a higher likelihood of accidents.
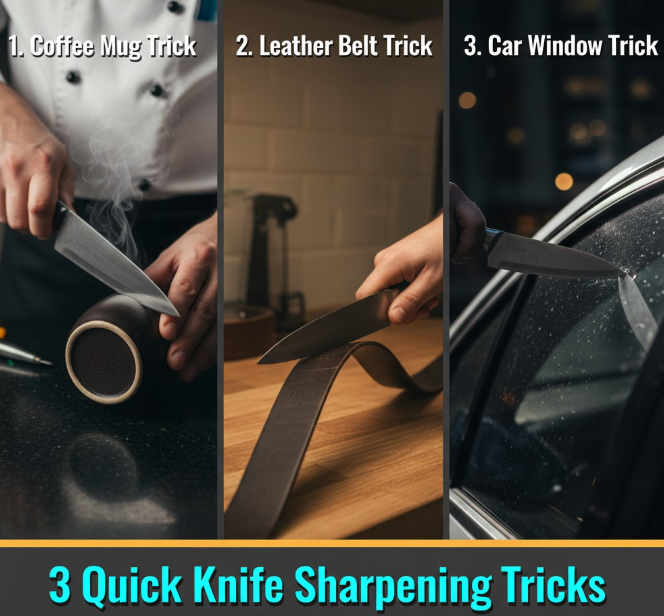
This article will show you three quick and easy knife sharpening hacks that anyone can master, without having to buy anything expensive or have any special kitchen-knife skills. These are techniques that will keep your blades ready — whether you’re fixing something up in a rush on a Monday night, or going all out for dinner guests.
Your Secret Weapon: The Coffee Mug Trick
What You’ll Need
This method requires something you already own in the kitchen: a ceramic coffee mug. The unglazed circle at the base of most ceramic mugs is just right for honing a knife. You don’t need fancy stones or complicated gadgets.
Choose a mug with a rough, unglazed bottom edge. This ring is composed from hard ceramic, it can sharpen and straighten your knife edge. This is a feature of most coffee mugs, so this is one of the easiest knife sharpening tricks to get your hands on.
Step-by-Step Process
First, put your coffee mug upside down on a stable place. Ensure the cup won’t slide when the time comes for sharpening. Have a damp towel beneath it to keep it steady.
Rest the knife on the rough ceramic ring at a 20-degree angle. You can picture this angle as approximately two coins placed side by side. No one’s throat has to be slit, but consistency is worth a lot more than perfection.
Pull the blade through the smooth ceramic ring, starting at the heel and exiting at the tip. Apply light to medium pressure. You would hear a slight sound of scraping.
Do this movement 10-15 times on one side of blade. Then turn the knife over and give it the same number of strokes on the other side. Using even strokes on both sides keeps this edge centered and sharp.
Testing Your Results
After sharpening, check your knife on a piece of paper. A well-sharpened knife should cut through paper without tearing. If it’s still not sharp enough to your liking, go over each side a few more strokes.
This is the best technique to use for everyday care as you get in and out of the house. It’s not for severely damaged blades, but it helps keep a moderately dull knives in good working order.
Knife Sharpening Steel: Traditionally, daily honing has been the recommended treatment for knives used both professionally and at home
Why Honing Differs From Sharpening
Honing is often confused with sharpening but the two are not interchangeable. Sharpening is the process of removing metal to generate a new edge. Honing restores the existing edge that has gone dull or rolled over if stone or ceramic, the existing metal curl has been hammered flat to produce a sharp edge.
Picture the edge of your knife as a row of minute teeth. On normal cutting, these teeth curve off to the side instead of going straight down. A honing steel works them into some semblance of order, putting the edge more or less back where it needs to be so it cuts.
One of the best knife sharpening tips for regular use is this trick, which can be done in just seconds and will significantly prolong the time between actual sharpenings.
Proper Honing Technique
Hold the sharpening steel upright; perpendicular to the board or work surface. This position offers you balance and control.
Place your knife on the steel at a 15-20 degree angle, begin with the heel of the blade that’s closest to the handle. And the angle should be a little lower than that of the coffee mug technique.
With one fluid motion, draw the knife down and across the steel, keeping tension between blade and metal and pulling towards you so that the entire blade comes into contact from heel to tip. Use very light pressure — you are realigning, not removing metal.
Alternate sides with each stroke. Do 5-7 passes per side for basic maintenance. You can sharpen your knife before each use without worrying to wear the blade.
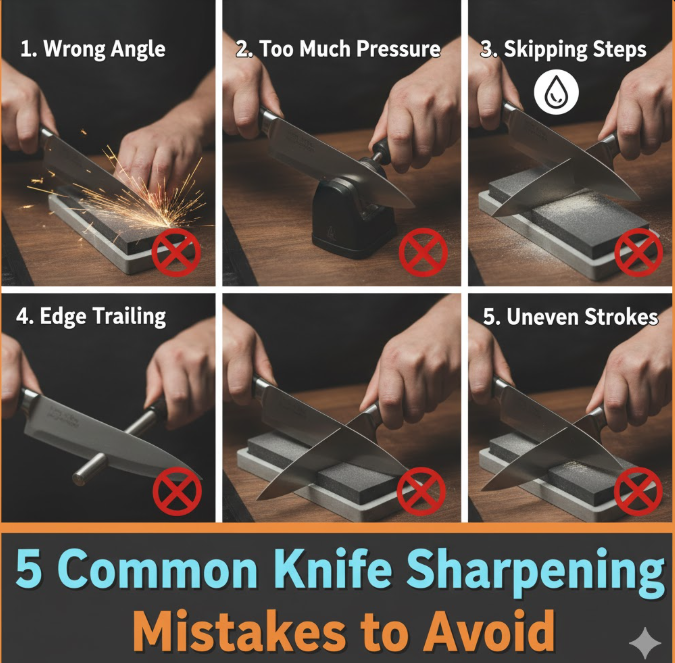
Common Mistakes to Avoid
Too much pressure is often used when honing. This can be more harmful than good to the edge! All it takes is light pressure.
Another mistake is inconsistent angles. Endeavor to keep the angle consistent with each stroke and from one side to the other. With practice, this becomes natural.
Don’t rush the motion. Slow and controlled works better than fast and aggressive. Think smooth and steady.
The Whetstone Method: Pro results at home
Choosing the Right Whetstone
Whetstones are offered in a variety of grits, indicated by number. Lower numbers correspond to coarser stones, which remove more metal. The higher the number, the finer and more polished the edge.
For most home cooks, a two-sided whetstone featuring 1000-grit on one side and 3000 to 6000 grit on the other is all you need. The rough side sharpens and the fine side polishes.
This is the most foolproof of all knife sharpening tips I’ve discussed. It is slower than either of the other techniques, but produces professional looking results.
Preparing Your Whetstone
The majority of whetstones should be soaked in water for 10-15 minutes prior to using the stone. Some stones only require a spritz. Read the manufacturer’s instructions for your kind of stone.
To avoid the stone slipping, put the soaked one on a damp towel. You want your work surface to be a comfortable height. You’ll spend a few moments here, so the right setup is key.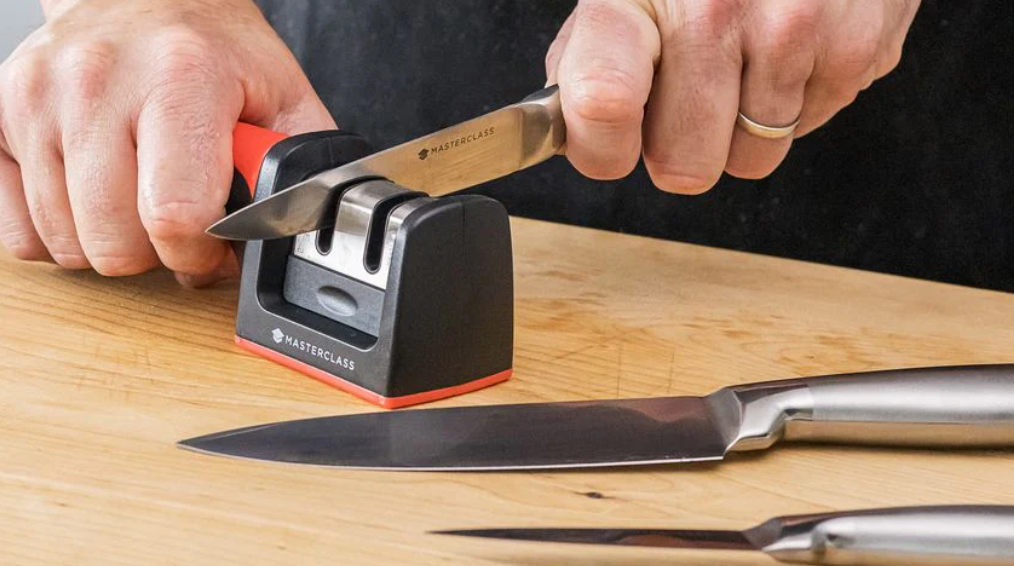
The Sharpening Process
| Stage | Grit Level | Strokes Per Side | Goal |
|---|---|---|---|
| Initial Sharpening | 1000 | 20-30 | Remove damage, build new edge |
| Refining | 3000-6000 | 15-20 | Polish edge, remove burrs |
| Finishing | 6000+ (optional) | 10-15 | Mirror polish for ultimate sharpness |
Begin by using the coarse side of your stone. Use at 15-20 degree angle, applying an even pressure as much as possible rotation.
Draw the blade along the stone away from you, working from heel to tip. Pick up the knife and move back to your starting point for another go. Do not push the knife back toward you on the stone.
Allow 20-30 strokes on one side before flipping knife to draw it through the other side. You should also feel a little burr developing at the edge — that thin, raised line of metal is how you know you’re actually taking something off.
After you’ve raised a burr on each side, flip the stone to its finer grit. Repeat using fewer strokes, giving attention to polishing the edge and de-burring.
Maintaining Your Whetstone
Keep whetstone wet and maintain water on stone for best results. After that clean the stone with cold water and let it dry thoroughly in air. Wet whetstones should never be stored wet because these could cause the stone to crack and develop mold as well.
After repeated use, whetstones end up with low spots. They can be flattened on a flat stone with some flattening compound, or coarse sandpaper if you don’t have a handy flattening stone. A flat stone is indispensable for producing the most consistent results.
How Frequently Should You Use These Strategies?
Daily Honing
Employ the honing steel either before or after every cooking session. It takes 30 seconds and helps keep your knives at their best. Think of it as routine maintenance, the equivalent of brushing your teeth.
Professional chefs sharpen their knives several times in one shift. For home cooks who use their knives on a regular basis, excellent results can be accomplished with once-daily honing.
Weekly Touch-Ups
Use the coffee mug method as a weekly “tune up” for knives that get lots of real life usage. Spend two minutes on each knife you use a lot.
This schedule eliminates knives getting too dull and decreases the need for sharpening knives less frequently but more rigorously.
Monthly or Quarterly Sharpening
Use the whetstone method every 1-3 months, depending on how often you cook and what you’re cutting. Knives used for heavy-duty tasks like breaking down chickens or cutting through squash will require more attention still.
For people who cook infrequently, sharpening once per quarter may be enough. And for more casual cooks, sessions once or twice a month may be enough.
Safety Tips for Sharpening Knives
Protect Your Hands
Sharp knives, and sharpening devices can easily cut you. Always ensure that your fingers remain behind the edge of the blade. Don’t ever check for sharpness by running your finger along the edge.
To test for sharpness, there’s the paper test or the tomato test. A sharp blade can cut ripe tomato with the weight of the blade alone.
Stable Work Surface
Each of these knife sharpening hacks relies on having a stable surface. A slipping mug, steel or whetstone is a potential for injury. Place wet towels under your tools to hold them stable.
Work at a comfortable height in good light. Bad form can result in bad technique and possible injuries.
Focus and Patience
Sharpening requires concentration. You don’t want to have a television going or be talking — you want to focus on the task at hand. One little slip and you could cut yourself or at least wreck the blade.
If you’re getting tired or frustrated, then take a break. Sharpen when you are not focused at your peril.
Extending Blade Life Between Sharpenings
Proper Cutting Surfaces
Glass and ceramic cutting boards are knife edge destroyers. These have hard surfaces that wear down your blade faster and you will need to sharpen them more.
Opt for wood or plastic cutting boards, instead. These softer, gentler materials result in less wear on knife edges and prolonged time between sharpenings.
Storage Matters
Knives that fly loose in a drawer batter against other utensils, blunting and nicking the edge. This negates all the work you did to sharpen them.
Keep knives in a knife block or magnetic strip, or use blade guards. Correct storage can prevent damage to the edge of your knives to keep them sharp longer.
Hand Washing Only
Dishwashers are tough on knives. That can damage the blade and handle, which is high heat and harsh detergents. The knife rattles against other objects as well in the wash.
Hand wash the knives as soon after use as possible. Dry them completely to ward off rust and corrosion, particularly on carbon steel knives.
Which Method Should You Choose?
Quick Fixes: Coffee Mug Method
When you are in the middle of making dinner and find that your knife is too dull to slice, coffee mug method to the rescue. Fast, easy and efficient for moderate dullness.
This is a great method for beginners who would like to learn some knife sharpening hacks without purchasing any equipment. Who doesn’t have a ceramic mug and thus easy access to this?
Regular Maintenance: Honing Steel
For cooks, honing steel offers a good compromise between speed and effectiveness. That way, it stays nice and it’s effortlessly sharpened.
If you’re a frequent cook, invest in a good honing steel. A good steel will last for years and make knife maintenance a breeze.
Complete Restoration: Whetstone
A whetstone is your best bet for when your knives are really dull or have gotten damaged. It takes off just enough metal to create an entirely new edge.
Properly using a whetstone requires some practice, but the results are worth it. Your knives will be sharper than they have been in years. For professional knife sharpening services and expert techniques, you can also consult specialists who have mastered these methods.
Common Questions About Sharpening
Can You Over-Sharpen a Knife?
Too much sharpening is not only a waste of steel but also means shortened life for your knives. That being said, normal home usage after these tricks for sharpening knives won’t be problematic.
The trick is to sharpen as often as you need to, not more. If your knife is sharp it doesn’t need sharpening.
Do Electric Sharpeners Work?
Electric sharpeners are convenient, but they take off more metal than is needed. They also don’t allow much control over the angle, which can produce an inconsistent edge.
For the occasional touch up on inexpensive knives, electric sharpeners are fine. Manual is better for good quality knives, and gives better results in my experience – more control.
What About Professional Sharpening Services?
Professional knife sharpening services yield the best results, particularly for high-end or damaged knives. They’ve got professional-grade equipment and many years of experience.
Think about having them professionally sharpened once or twice a year and use these manual knife sharpening tips for in between. This approach also prevents any harm to your blades.
The Sharp Knife Bottom Line
Sharp knives make the difference between cooking and chore. Food prep is quicker and more fun when all your gadgets are working.
These three knife-sharpening hacks — the coffee mug method, honing steel technique and whetstone sharpening will give you options for every situation. Quick fixes, daily care and even a return to pristine shine – they are all now an effortless reality.
Simply begin with the one that appears easiest to you. Work on one technique until you are confident enough to move onto another. Before you know it, knife care will be second nature to you.
Your knives are among the most important tools in your kitchen. The special talent and expensive equipment that they need to be cared properly isn’t anything extraordinary. With these basic skills, anyone can keep their blades sharp and ready for use.
Practice makes perfect, keep that in mind. Your earliest attempts will be awkward, but every session builds muscle memory. Soon you will hone as reflexively as you tie your shoes.
The difference between cooking with dull and sharp knives is astounding. Here’s the deal: You’re going to work faster, you’re going to get what you want more – and you’re going to have a better time. That’s why it’s worth taking a few minutes to maintain your knives properly.
For more comprehensive guidance on knife care and maintenance, check out America’s Test Kitchen knife sharpening guide for additional expert tips.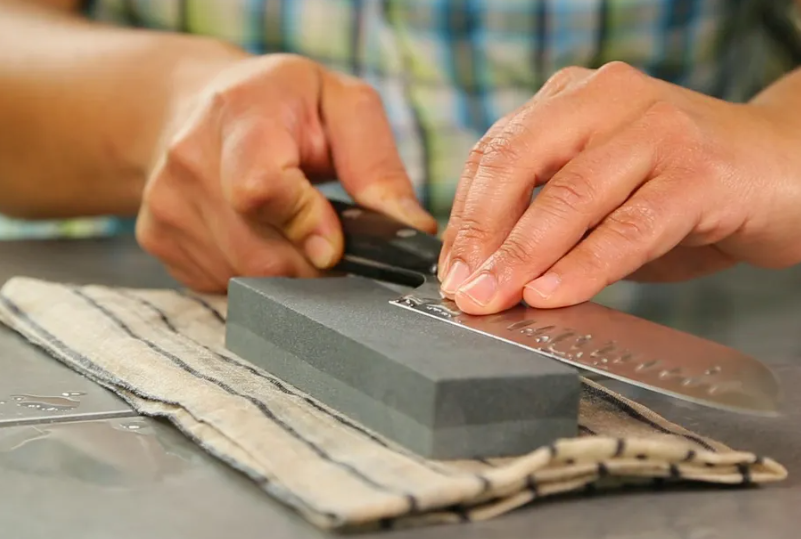
Frequently Asked Questions
How can I tell when my knife needs to be sharpened?
If your knife can’t cut through a tomato or piece of paper as easily, then it’s time to give it some care. You may feel yourself exerting more pressure when cutting, or find that food is breaking instead of cleanly slicing. Hone it first—if that doesn’t bring performance back, your knife’s in need of some serious sharpening.
Can I use these techniques on serrated knives?
Serrated knives cannot be sharpened without a proper tool or service. These methods are best for straight-edged knives. The vast majority of serrated knives remain sharp for years with typical use and do not require maintenance very often.
At what angle should I be holding the knife as I sharpen it?
For kitchen knives, 15 degree to 20-degree angle is applicable. Japanese knives tend to be sharpened at 15 degrees, Western knives at 20. It’s less about nailing any specific figure, and more about being consistent. When you do eventually settle on an angle that works, stick with it.
How long does it take to sharpen a knife with whetstone?
It’ll take you a good 5-10 minutes a knife when you’re learning. There is a learning curve, but experienced users can take 3-5 minutes to sharpen. Don’t go fast, slow is better than sloppy.
Does sharpening wear down my knives faster?
Sharpening employs a relatively small amount of metal — much less than one might imagine to be the case. A well-cared-for knife can last decades or generations. Bad technique or over sharpening results in more wear than necessary, be sure you know how and only sharpen when needed.
Can I use these methods for sharpening ceramic knives?
Ceramic knives need sharpening tools coated with diamond. Regular whetstones, honing steels and the old coffee mug trick will not work on ceramic blades. Special sharpeners for ceramic knives are offered by many manufacturers or you can bring them to a pro.